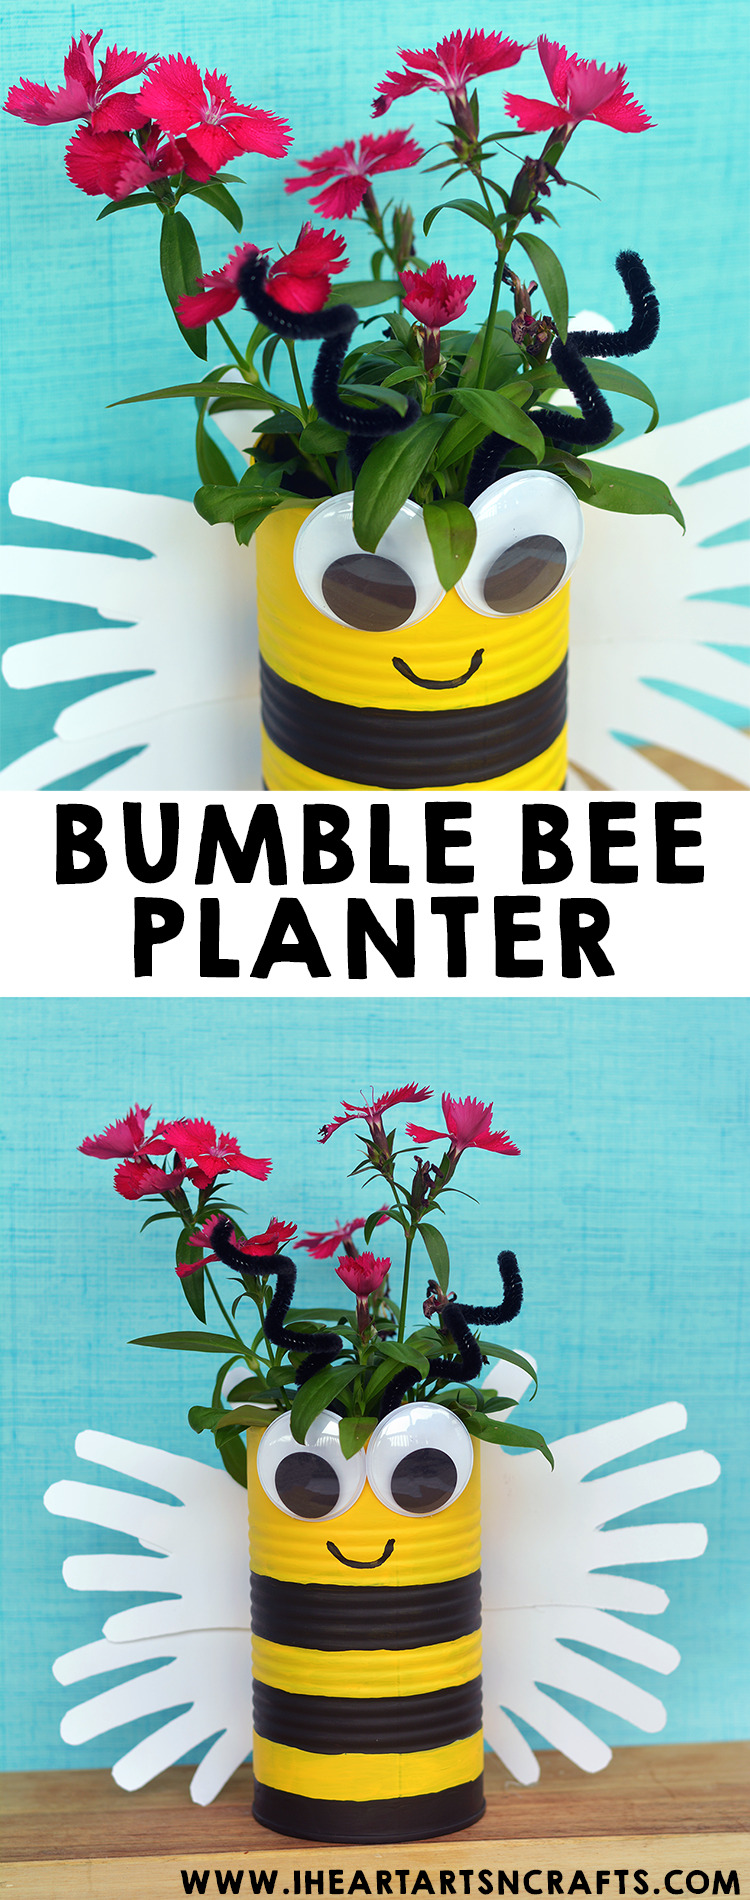
I was inspired last week by the Handprint Lady Bug Planters I shared, so I decided to do a cute little twist and make some Handprint Bumble Bee’s to go with them. These make the sweetest gift for Mother’s Day or just a fun summer craft project just because. Recycle some tin cans and follow the directions below!
Here’s how to make your own Handprint Bumble Bee Planter.
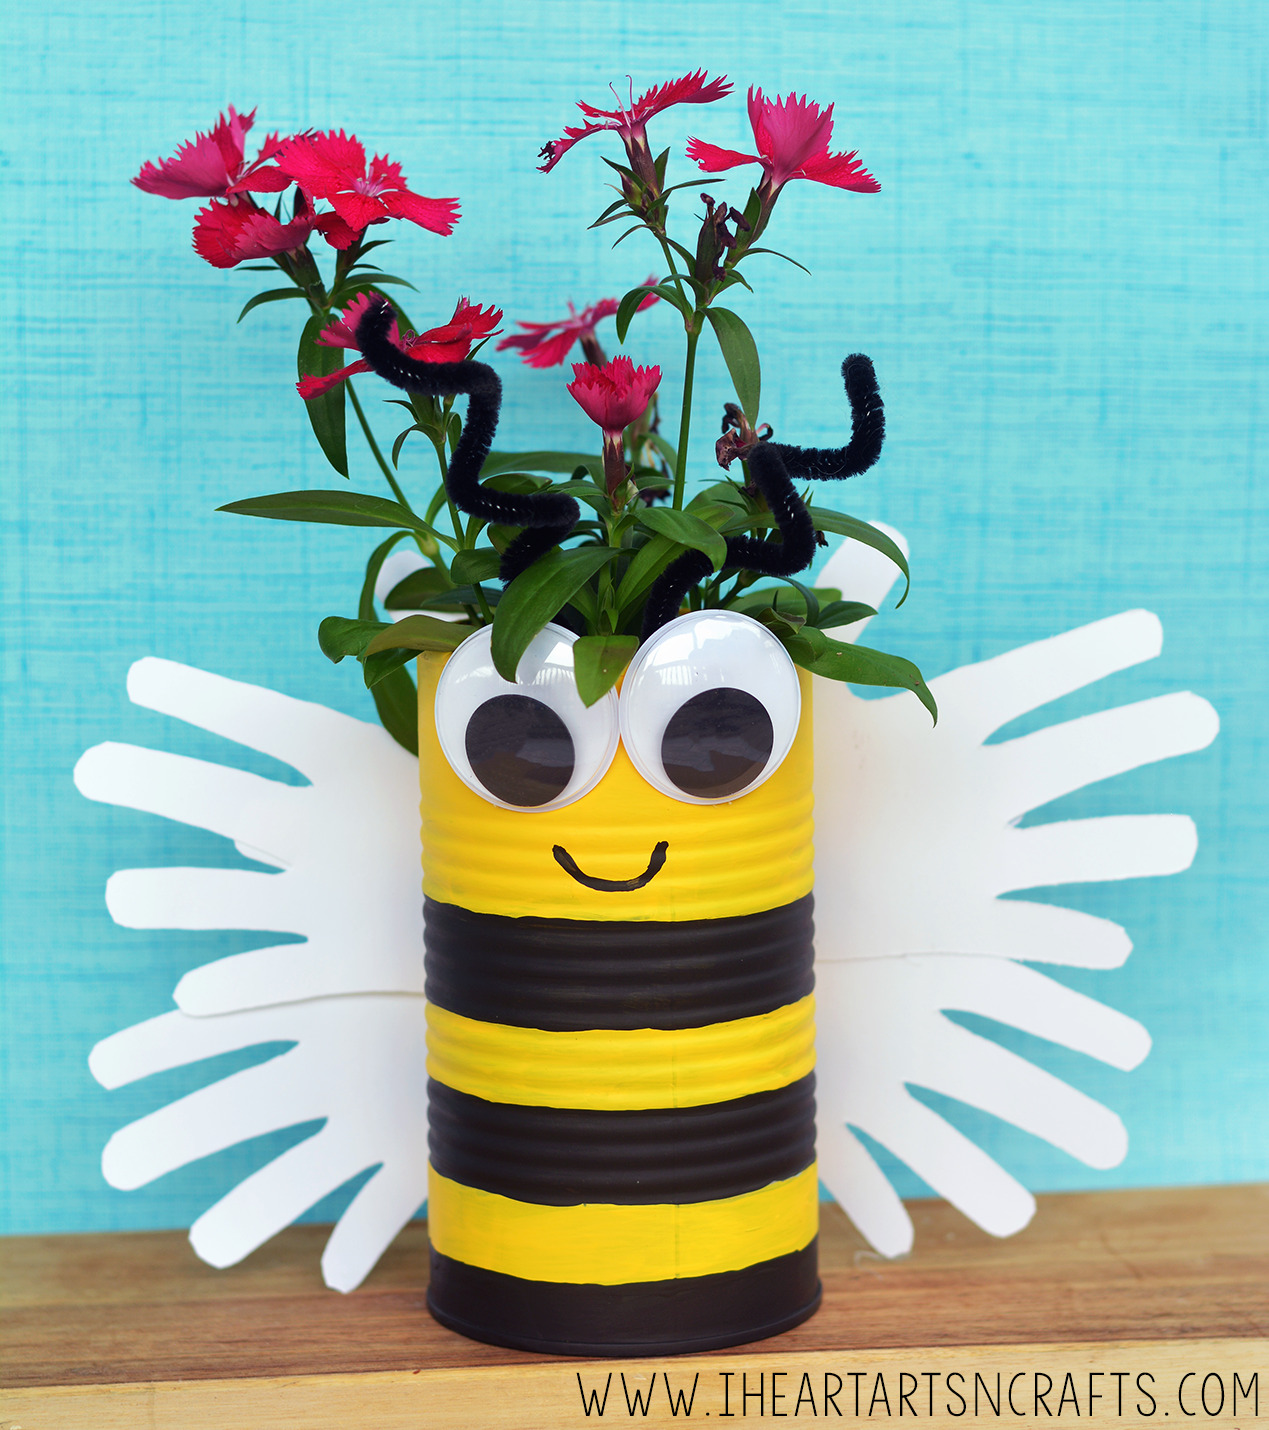
Handprint Bumble Bee Planter Craft
This post contains affiliate links. Please see my disclosure policy.
Materials Needed:
- Tin Can
- Yellow and Black Paint
- White Cardstock
- Glue Gun
- Scissors
- Googley Eyes
- Black Pipe Cleaners
- Nail and Hammer
- Sandpaper
Directions:
1.You’ll want to start by prepping your tin can for painting. Take a hammer and nails and make some holes on the bottom of your can, then if the edges are sharp you can take some sand paper to smooth it out.
2. After you’ve finished with your holes you can start painting your bumble bee using yellow and black acrylic paint. I used a few layers on mine.
3. While your paint is drying go ahead and trace your child’s hand on some white card stock. You’ll want four handprints cut out to use for the wings. If you’d like something sturdier than cardstock you could also use cardboard and paint it white.
4. After your paint is dried you can hot glue everything on. Glue on two google eyes and your handprints for wings on the back of the can. Then using some black paint add on a mouth.
5. If you’d like to insure that this tin can planter lasts a long time, give the entire can and wings a coat of mod podge or spray sealer.
6.Fill the can with soil and then add your plant.
Your tin can planter is finished!
And don’t forget to follow I Heart Arts n Crafts on Facebook and Pinterest! And if you decide to make any of my crafts, please share them on my Facebook page or use #iheartartsncrafts on Instagram for me to see!
Pin it to save for later: