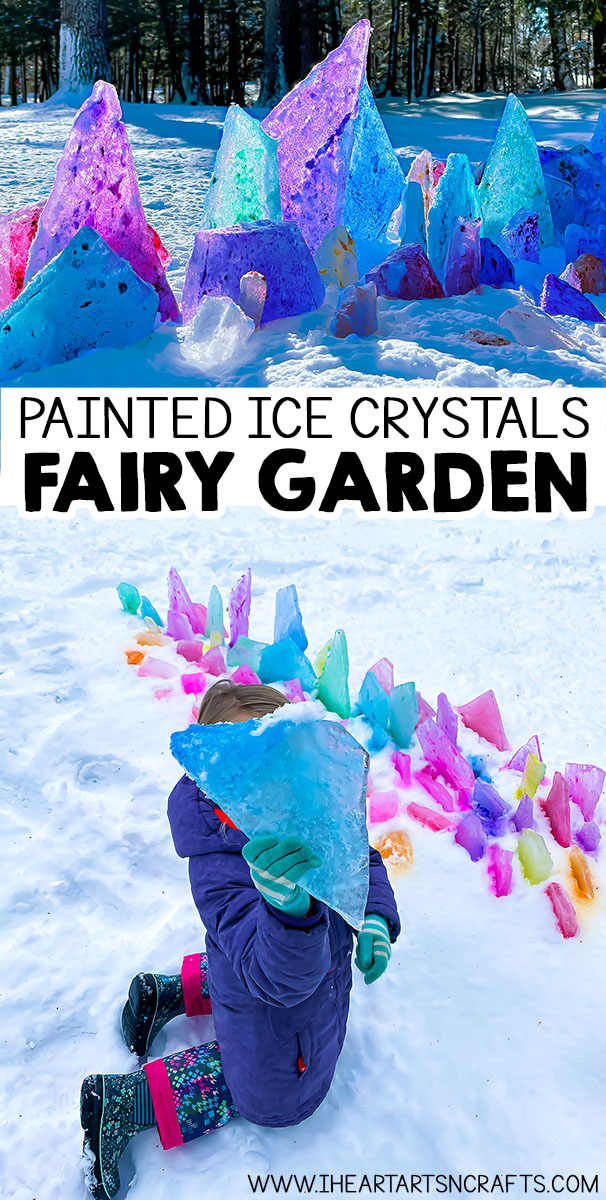
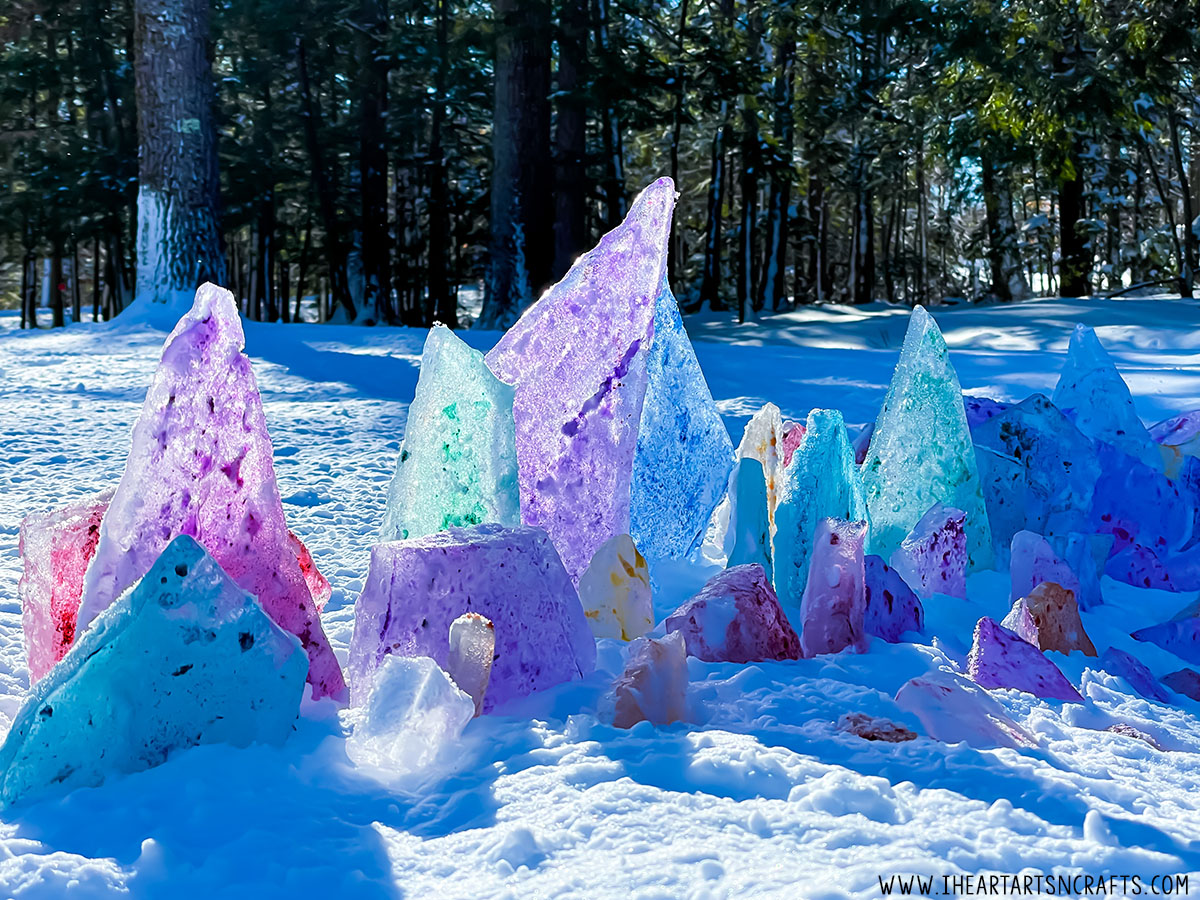
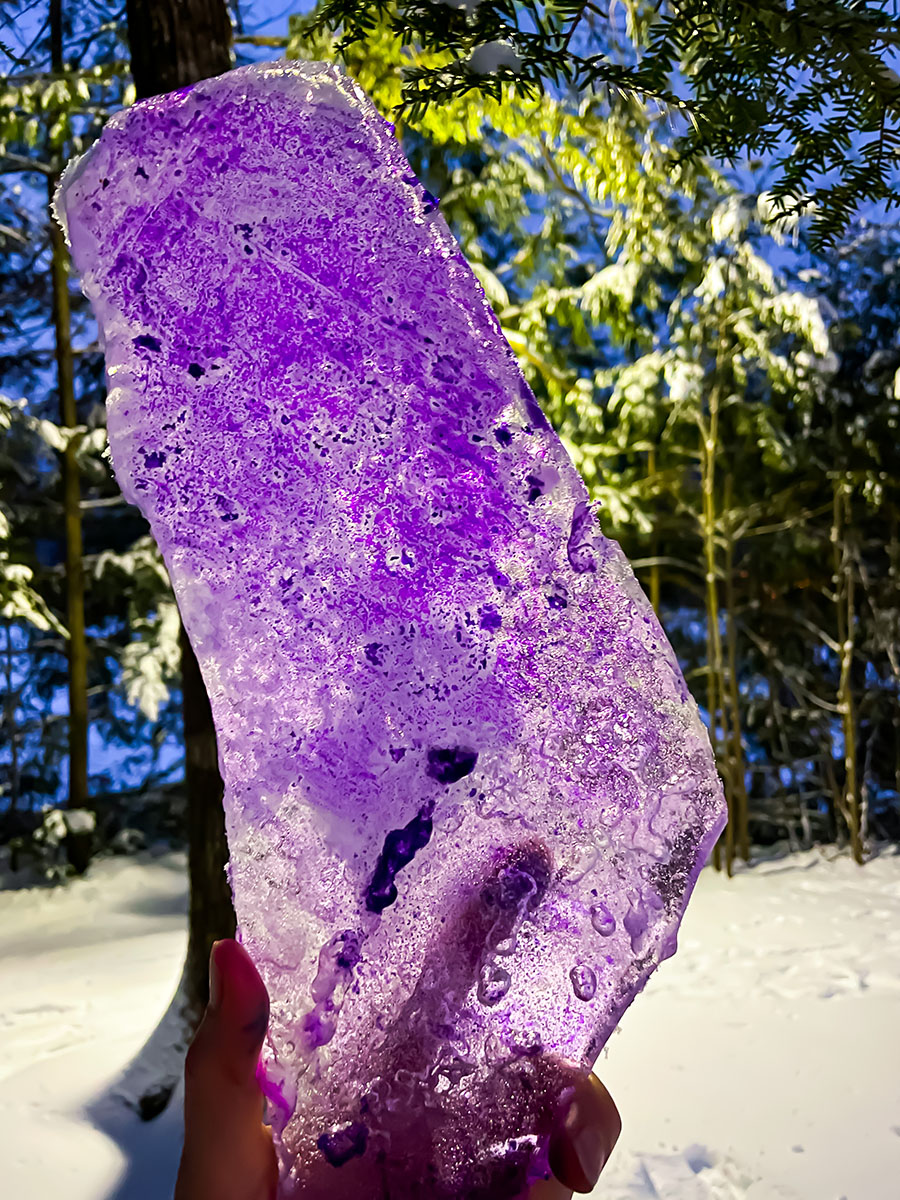
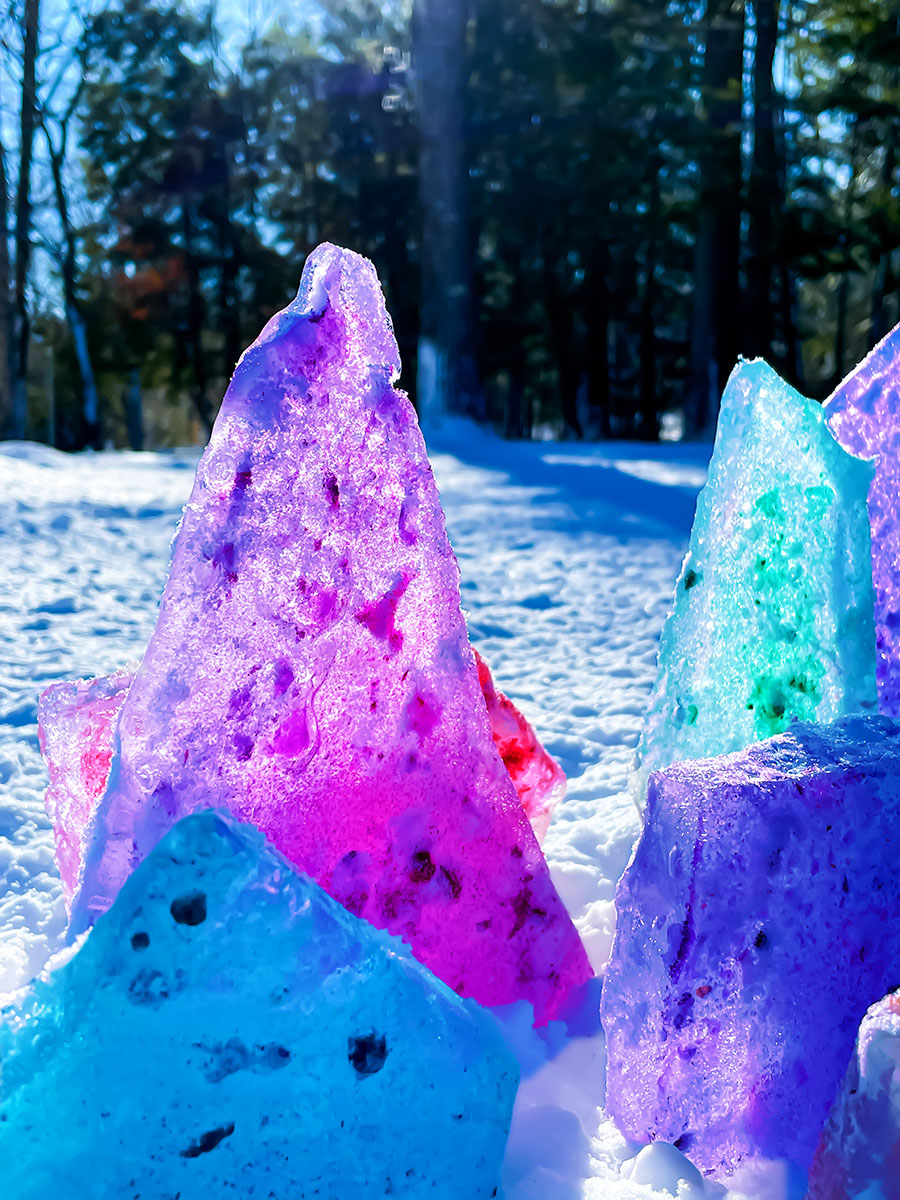
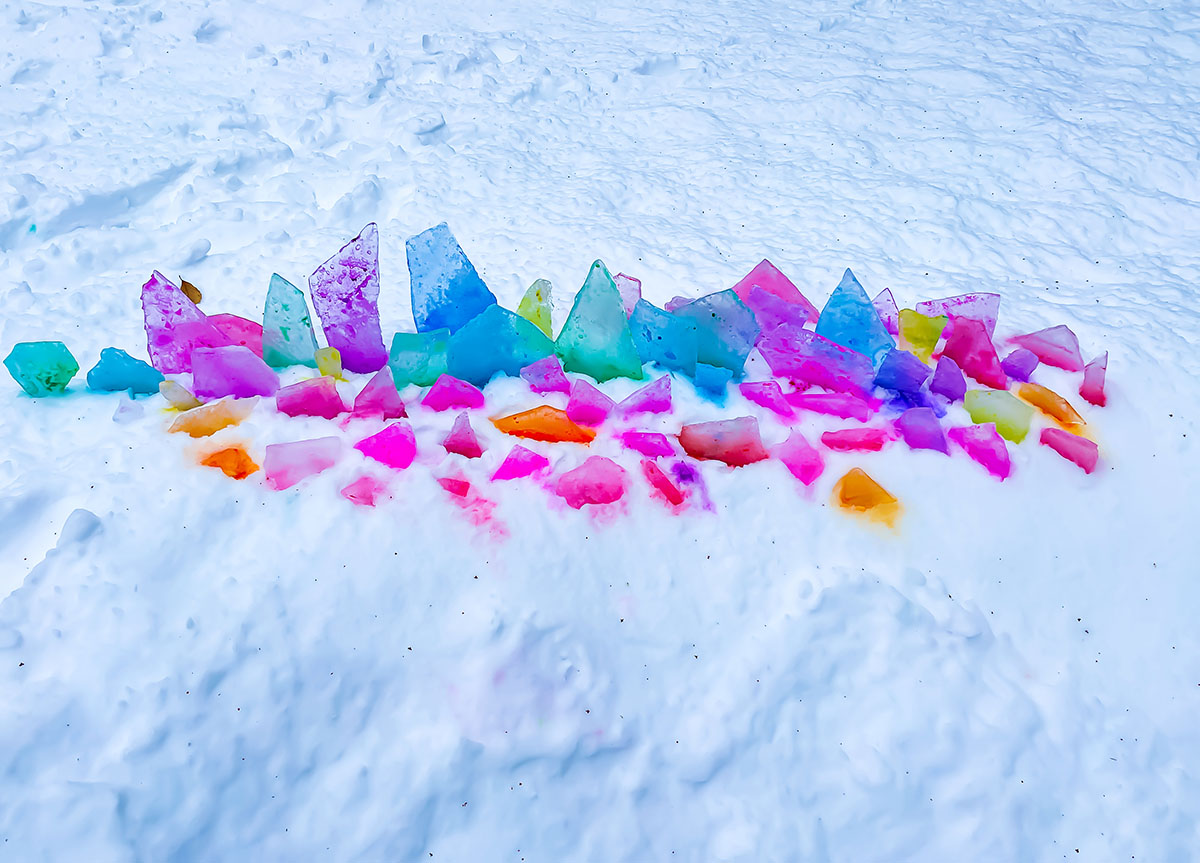
This Painted Ice Crystals Activity is such a fun winter sensory activity that you can do outdoors. We set ours up as a colorful fairy garden that looks so pretty in the sun!
How To Paint Ice Crystals
This post contains affiliate links. Please see my disclosure policy.
Supplies:
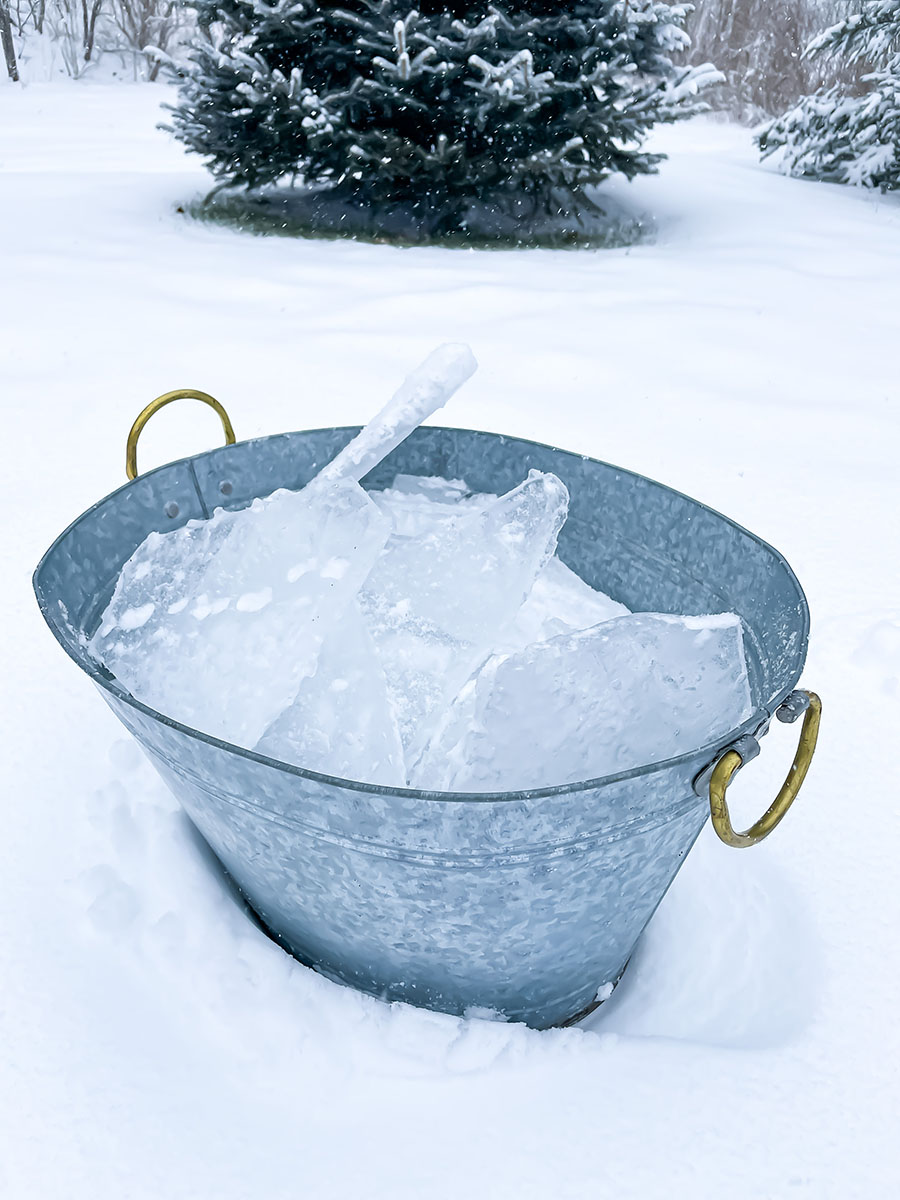
Ice: If you happen to live in a COLD climate you can use ice or icicles you find outside (this ice we used develops on a porch roof that we need to knock down for safety reasons so this is a perfect use for it), or make ice! If making your own ice, you can do this project any time of year, just know warmer environments will keep the ice crystals from lasting as long.
*To make the large ice crystals: Use silicone baking trays or ice trays, line cookie sheets with silicone baking mats, anything along these lines will work nicely to help you quickly transfer the ice out once solid. Freeze outside or in your freezer until solid.
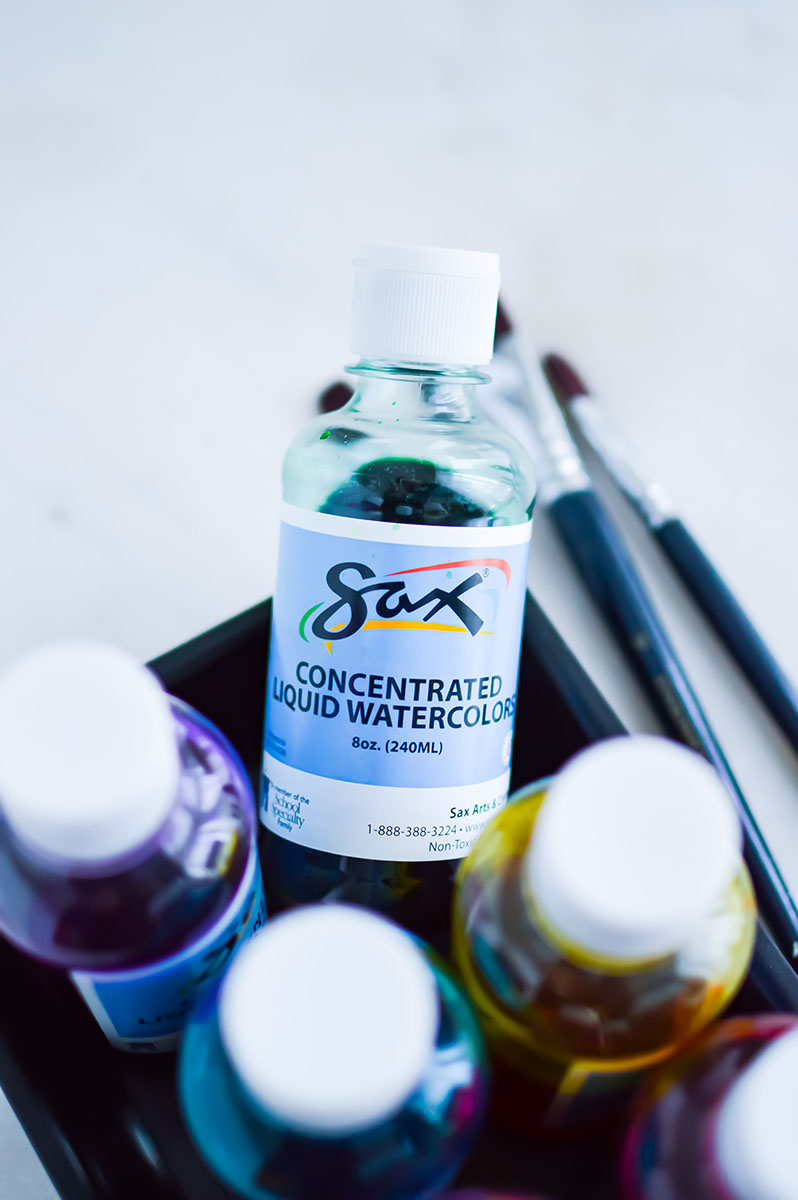
Paints: I used these exact water color concentrates, but you can use traditional kids watercolor paints too. We’ve had this exact set of colors for about 7 years, they will likely last you a very long time, great investment!
Paint brushes:
I used these exact ones
Process:
The colder the better! We did this project when it was about 20 degrees F out and actually painted them when it was snowing! At this temperature, the watercolor paints froze solid within about 45 seconds so you’ll want to work quickly!
Choose a work surface that will be alright getting a bit of paint on it. We made sure to spread out a layer of snow under where we were working.
Set out all of the ice pieces, brushing off any snow that may be on the top of them.
Get the paint brushes ready, make sure they are brushes that little hands can hold with gloves or mittens on. We chose gloves that we didn’t mind getting a little paint on just to be safe.
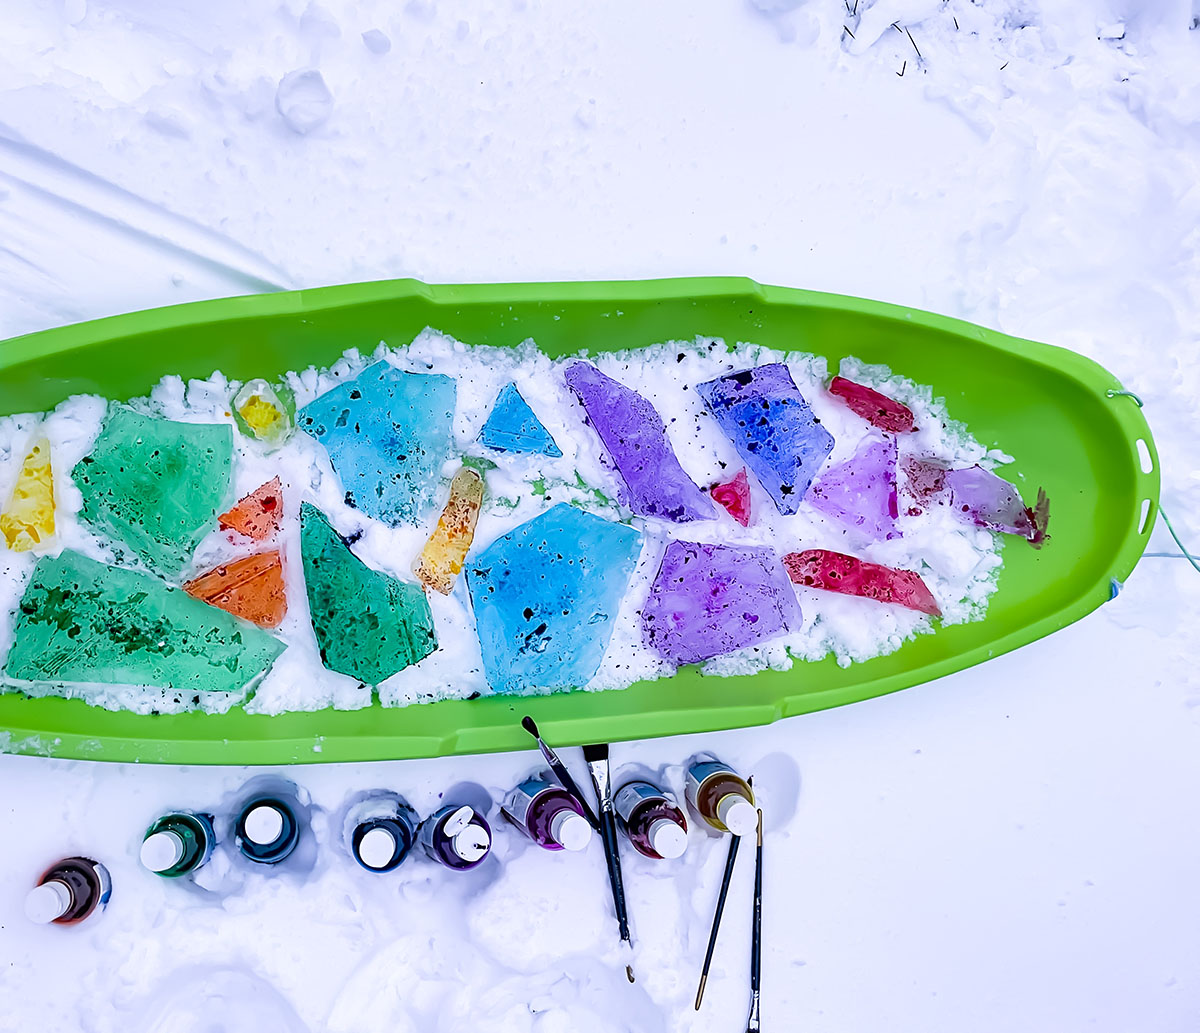
Squeeze a little of the water color right onto the ice pieces, you’ll want to work with one or two pieces at a time, otherwise it may freeze before you can get to the other pieces and will need to add more paint.
We brought out water to rinse our brushes but didn’t end up using it, we just planned out the colors we would use so they could nicely blend together as we made the rainbow of colors.

Let the color freeze on the ice pieces for a few minutes, again, the temperature in your location when doing this project will make a big difference in how it comes together.
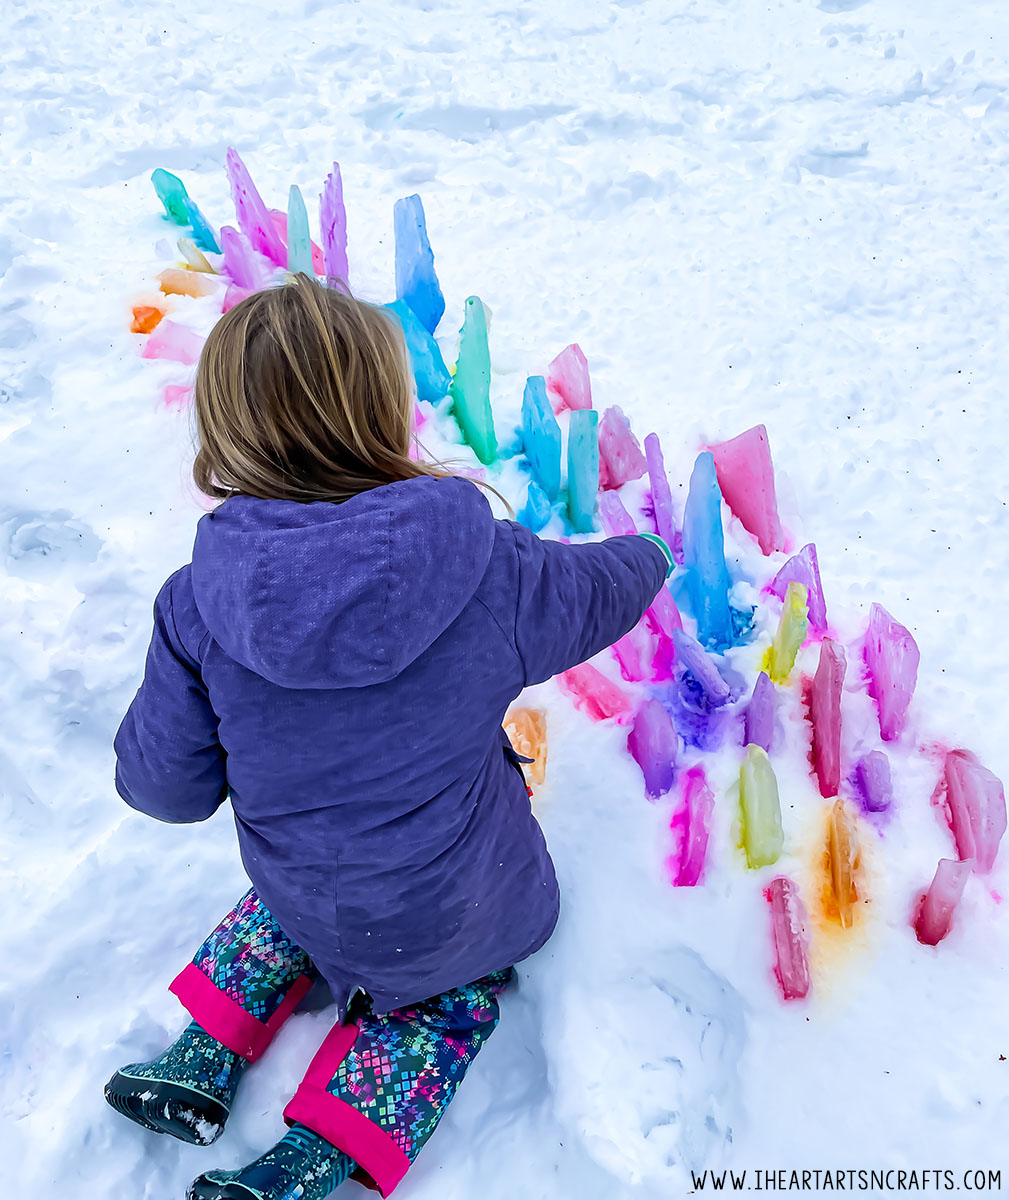
Picking up the ice crystals from their edges, carefully transfer them to where you would like to set them up. You can play with moving them all around, stacking, building… there are so many options!
Tips:
We we did this project we had about 4 days in the 20s then it warmed up on day five. By the start of day 6 the paint had run down into the snow… So we painted them again as soon as it got cold enough again on day 7!
Try to work in the shade and set up your works of art in the shade if you would like them to last longer. Even on the day it was only 12 Degrees F out, the ice we had in the sun was impacted and experienced some melting from direct sunlight.
Wear dish gloves or rubber gloves over your regular winter gloves! This will help keep the paints from getting your gloves wet-and prevent the gloves from going through a color transformation.
**Move the ice in a sled or garden cart instead of against coats and sleeves. This will help keep paints off clothing and make for faster work.
**Be sure to do this project over grass or an area that is much less likely to be affected by the paints as projects melt.
Make sure to follow I Heart Arts n Crafts on Facebook and Pinterest! And if you decide to make any of our crafts, please share them on our Facebook page for us to see!
Pin it for later: