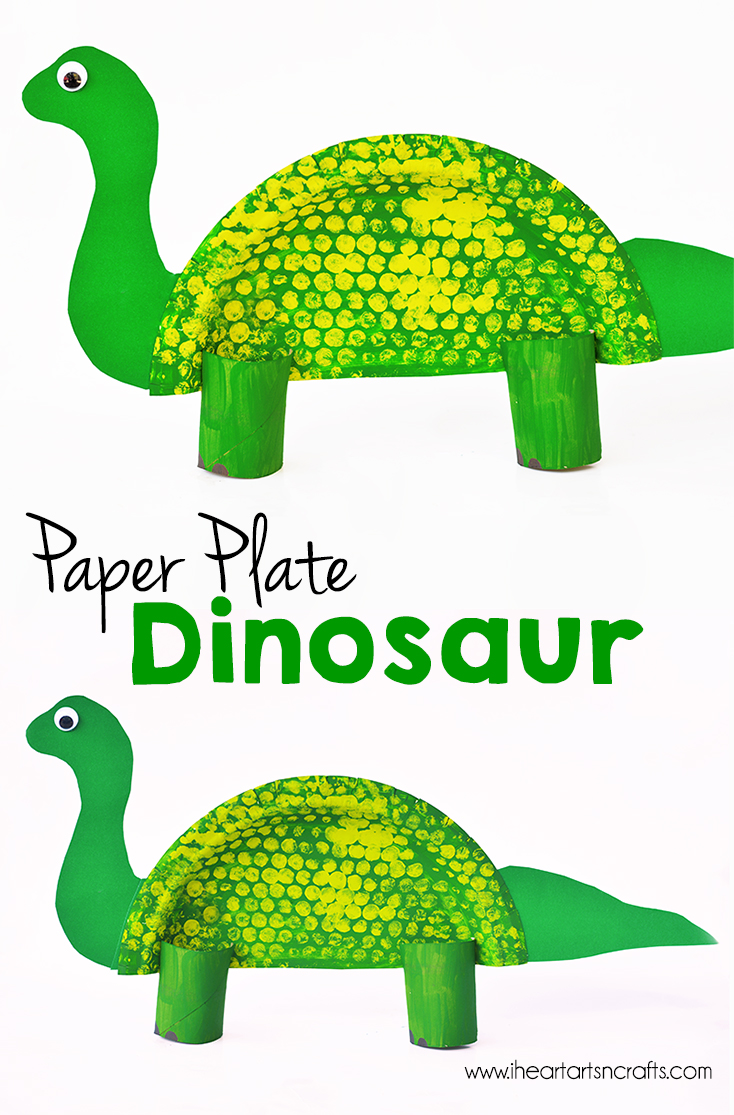
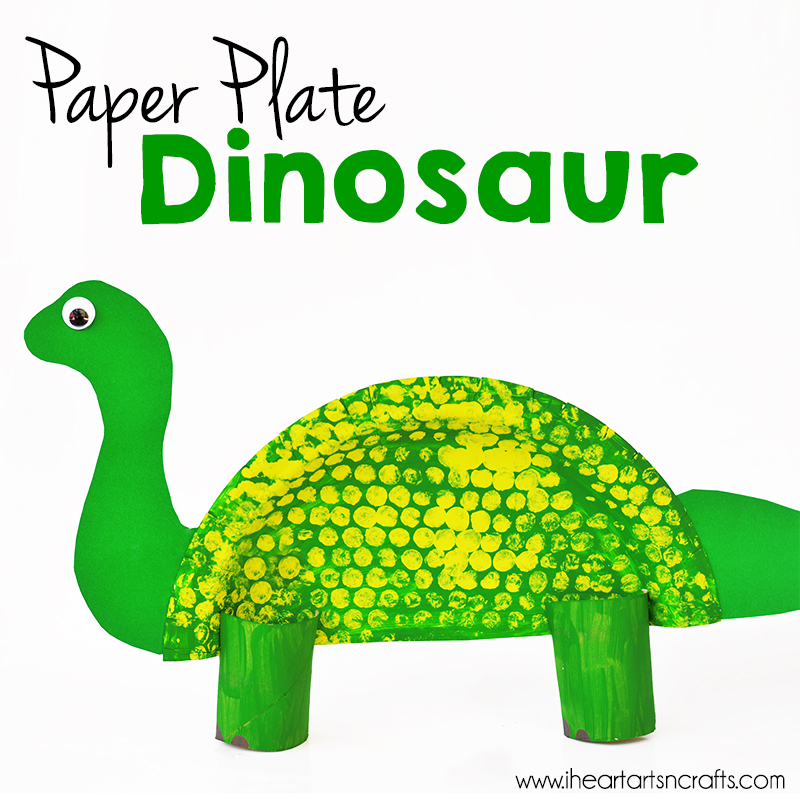
Today we are creating our own paper plate dinosaur using bubble wrap and paper towel rolls! My son and I are always looking for new ways to play with dinosaurs, the options with this craft are endless. You can make whichever dinosaur you’d like but we ended up choosing a Brachiosaurus for this project (Tyrannosaurus is on our to-do list!).
Paper Plate Dinosaur Kids Craft
This post contains affiliate links. Please see my disclosure policy.
Supplies:
- Paper Plate
- Paint
- Googly Eyes
- Bubble Wrap
- Paper Towel Roll
- Scissors
- Glue
- Card Stock or Construction Paper
Directions:
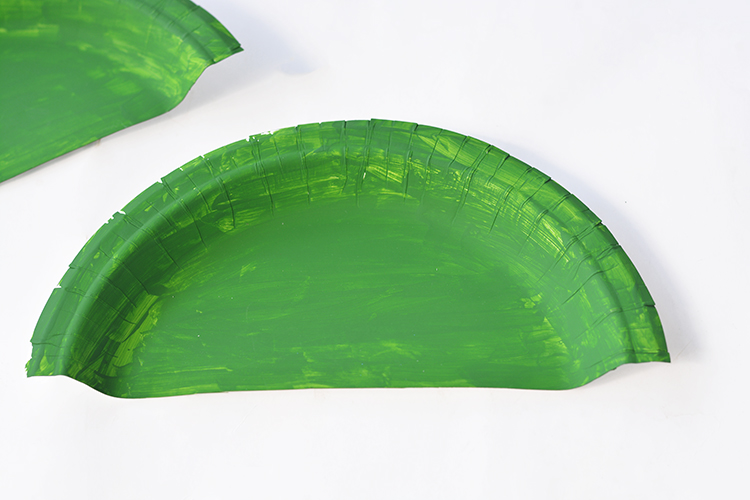
First pick the colors that you’d like for your dinosaur, cut your paper plate in half and then paint it.
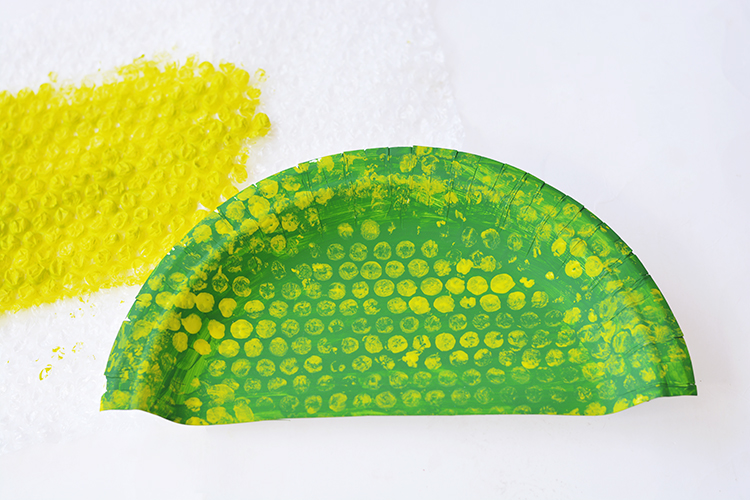
 Next, you’ll cut a small piece of bubble wrap and paint it a different color than the body of the dinosaur. Then you will stamp it across the paper plate.
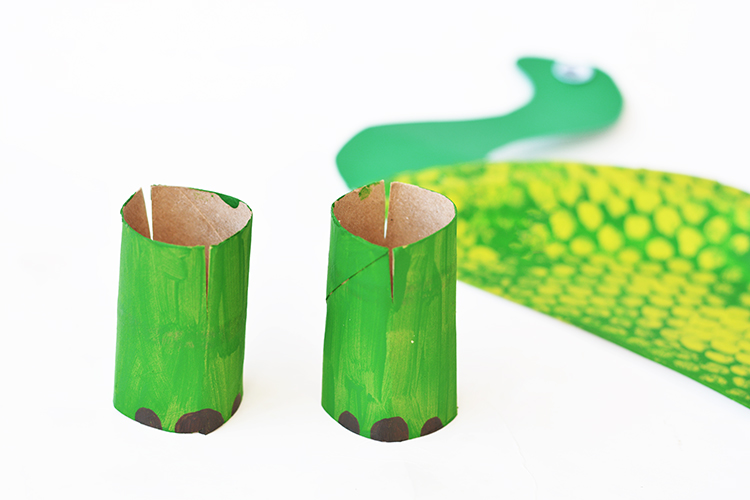
For the feet of the dinosaur we used paper towel rolls, cut the length that you’d like to use and paint them the color that you used for your dinosaur. When the paint has dried cut two slits directly across from each other on the top of the rolls. The paper plate will slide right into the slits so that the finished dinosaur can stand.
Finally, depending on what dinosaur you choose to do for this project you will cut out the head and tail, that will then be glued onto the paper plate. Add on the googly eyes and slip the dinosaur into the legs you painted earlier so you can display the finished piece!
Make sure to follow I Heart Arts n Crafts on Facebook and Pinterest! And if you decide to make any of our crafts, please share them on our Facebook page for us to see!