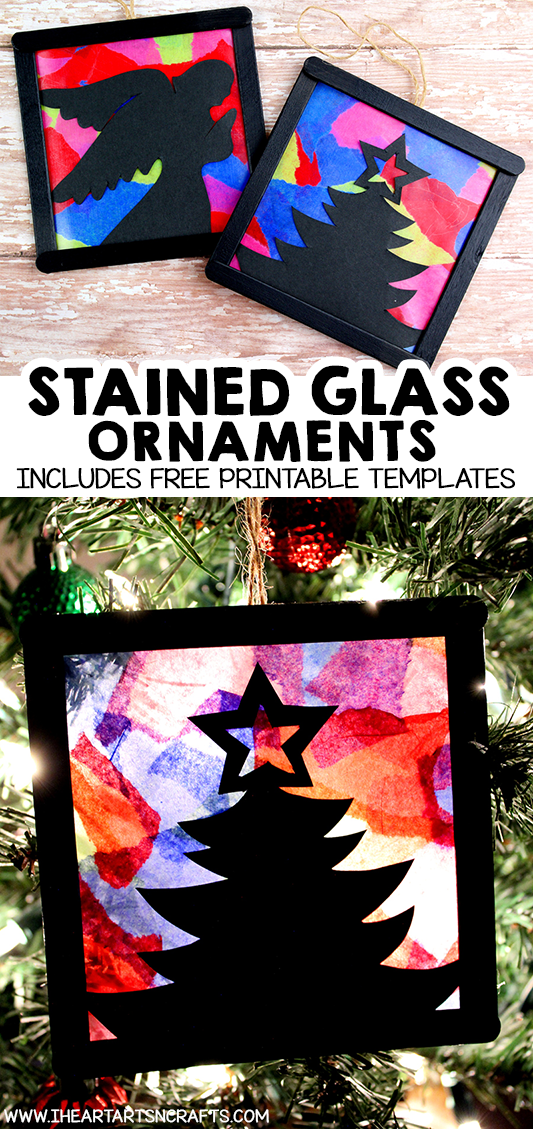
These Stained Glass Ornaments are such a fun and easy craft for kids to make, and they look so pretty next to the Christmas lights on the tree! They make the perfect winter craft for the holiday season! This Stained Glass tutorial comes with five free festive holiday designs that can print and cut out. Make sure to sign and date the back of the popsicle sticks so everyone remembers this adorable keepsake! Follow the directions below.
How To Make Stained Glass Ornaments With Tissue Paper
Supplies:
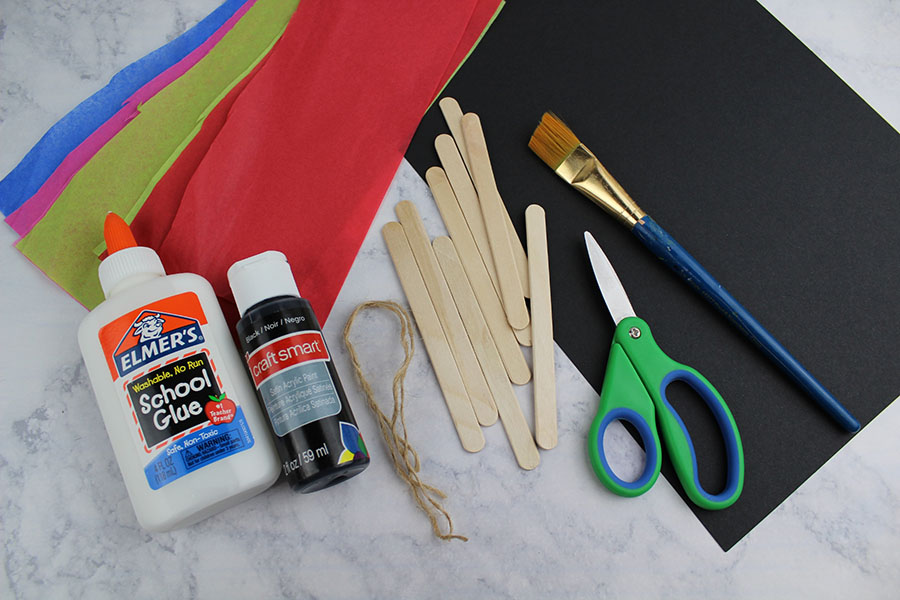
Tissue Paper
Scissors
Glue
Paintbrush
Black Paint
Popsicle Sticks
Twine
Black Cardstock
Directions:
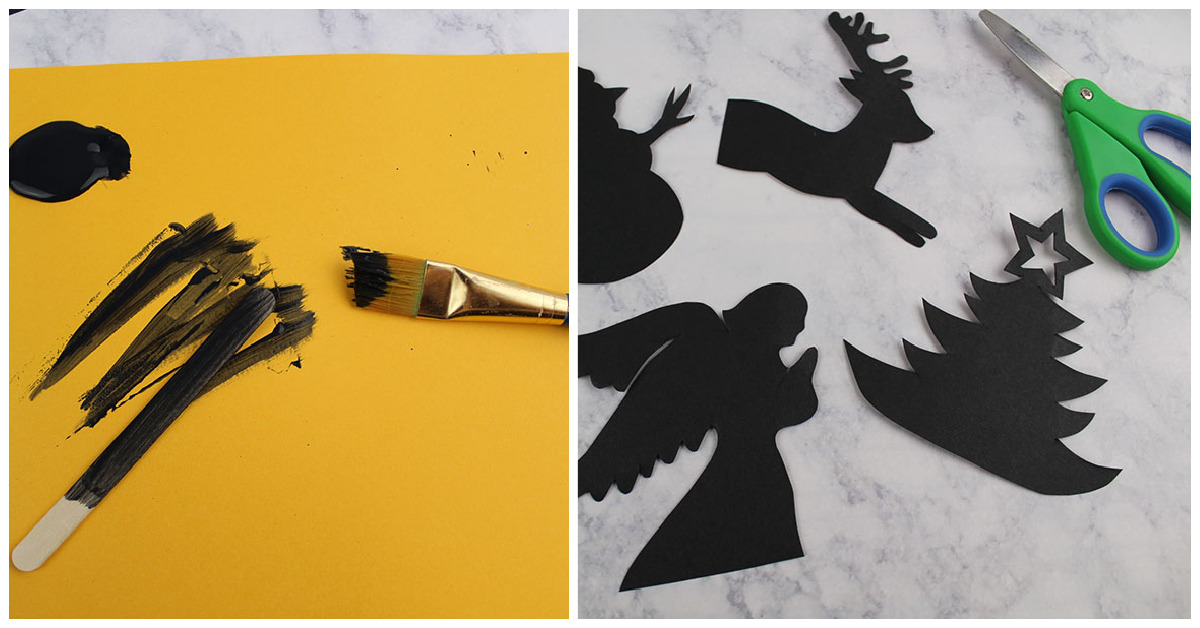
Step 1: Paint 4 popsicle sticks black. (you’ll need 4 popsicle sticks per ornament). Allow them to dry completely.
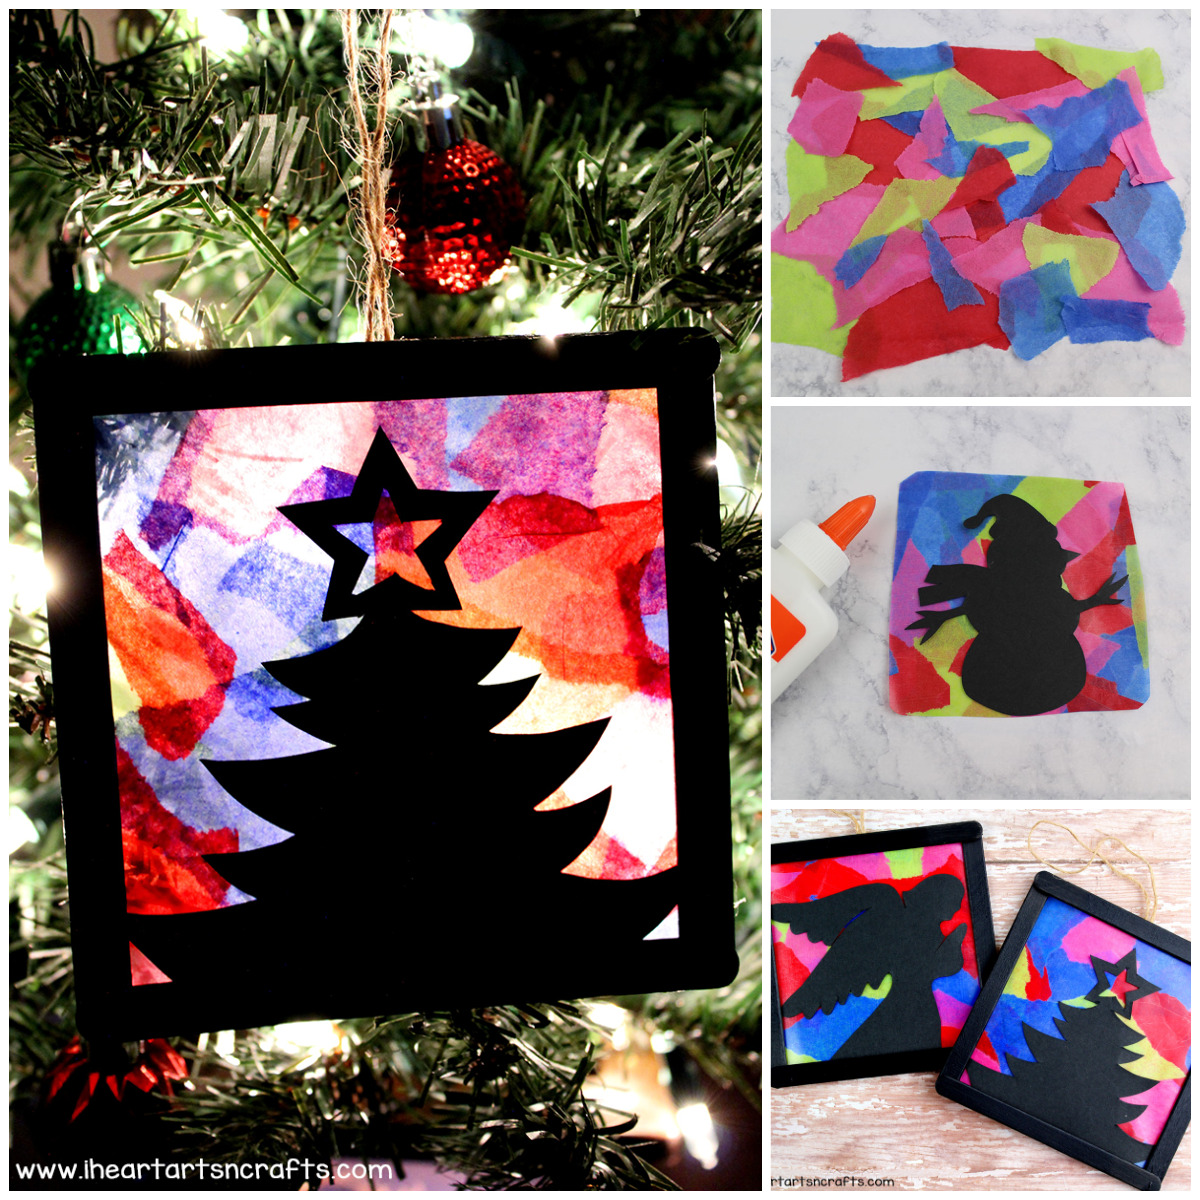
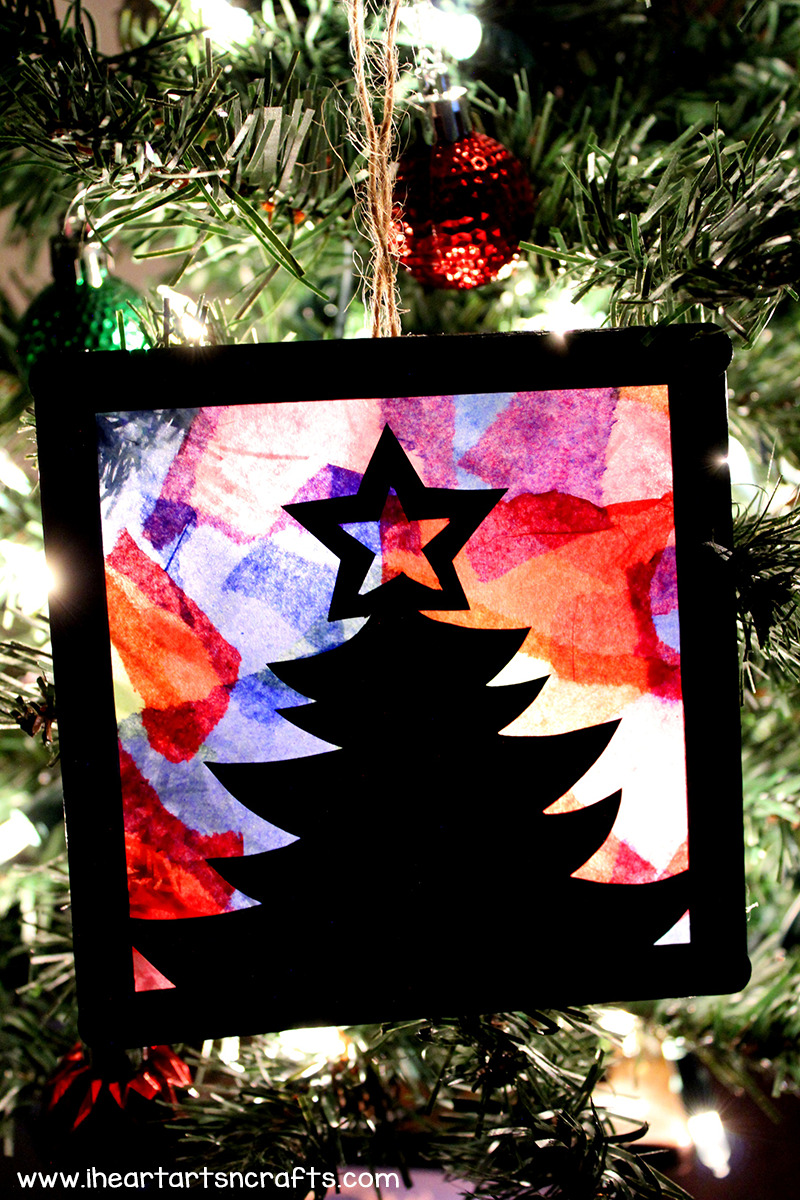
Step 2: While your wait for the popsicle sticks to dry, download the silhouette template by clicking here PDF SNOWMAN AND REINDEER FILE or PDF CHRISTMAS TREE AND ANGEL FILE and print out. Trace onto black cardstock and cut out. Set aside.
Step 3: Glue the popsicle sticks into a square.
Step 4: Rip tissue paper into small pieces.
Step 5: Cut a piece of contact paper a little larger than the size of the popsicle stick square.
Step 6: Cover the sticky part of the contact paper with the tissue paper.
Step 7: Cut a second piece of contact paper a little larger than the size of the popsicle stick square and cover the tissue paper. Press out any bubbles.

Step 8: Glue the silhouette onto the contact paper.
Step 9: Glue the contact paper onto the back of the popsicle stick square.
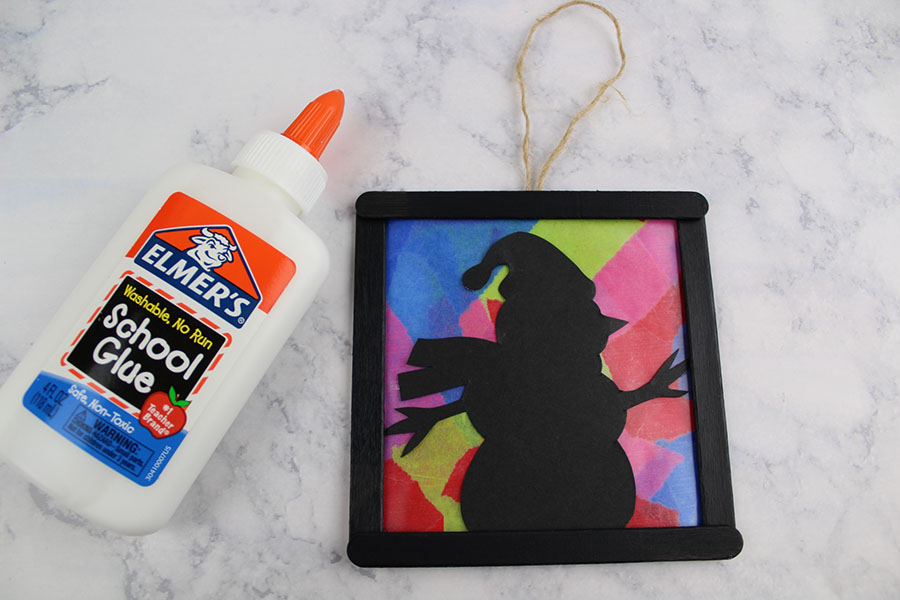
Step 10: Glue a small piece of twine to the top of the ornament for hanging on a Christmas tree.
Step 11: Your ornament is finished. These would make wonderful family keepsake gifts!
Make sure to follow I Heart Arts n Crafts on Facebook and Pinterest! And if you decide to make any of our crafts, please share them on our Facebook page for us to see!
Pin it for later: