Thank you Elmer’s for sponsoring this post. All opinions expressed are my own.
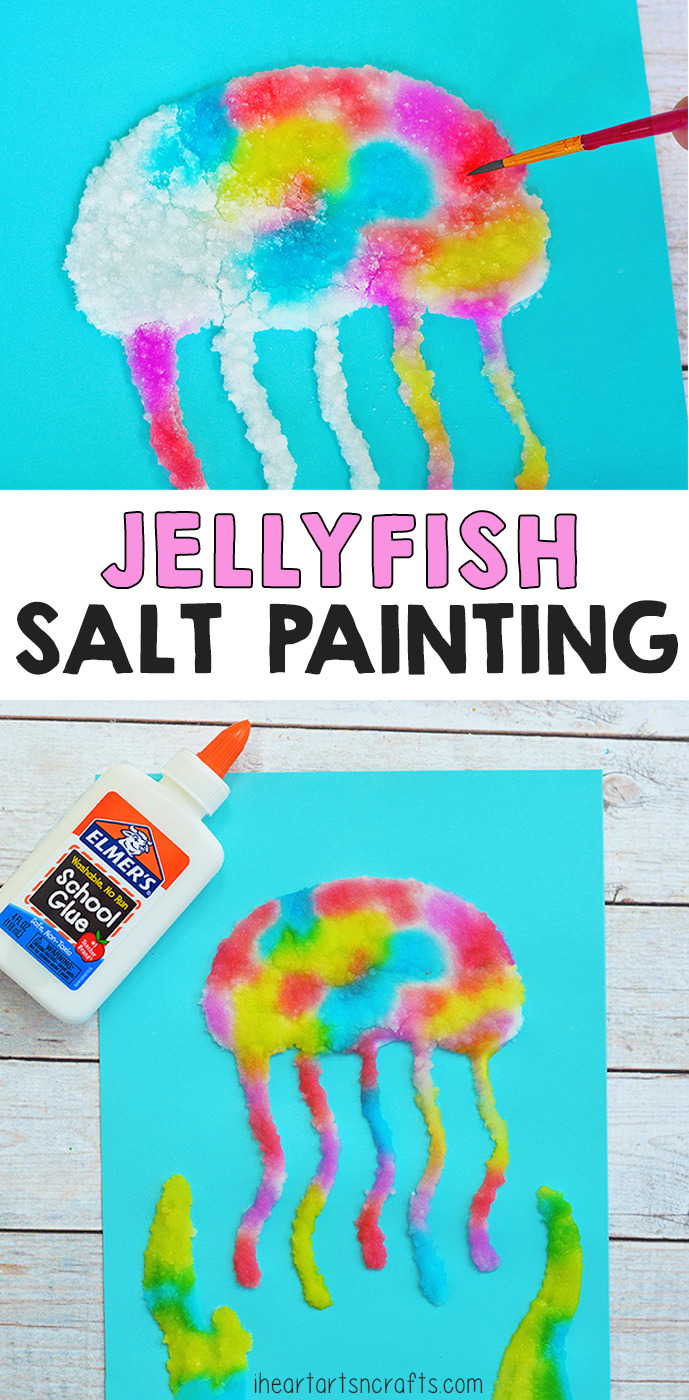
Today we’re experimenting with salt, glue, and watercolors to create some colorful ocean art. You’ll only need a few materials to create this project including table salt, liquid watercolors, and Elmer’s School Glue. Elmer’s is my favorite adhesive solution when creating long-lasting crafts and DIY projects. Some of my favorite ways to craft with Elmer’s in the past has been our colorful button snail and jellyfish, and this easy 3 ingredient puffy paint mixture! However, today we’re trying something that we haven’t tried before… Salt Painting! This was such a fun process art activity that memorized the kids while they watched the paint colors mix and travel along the lines of salt and glue.
Follow the tutorial below to get started!
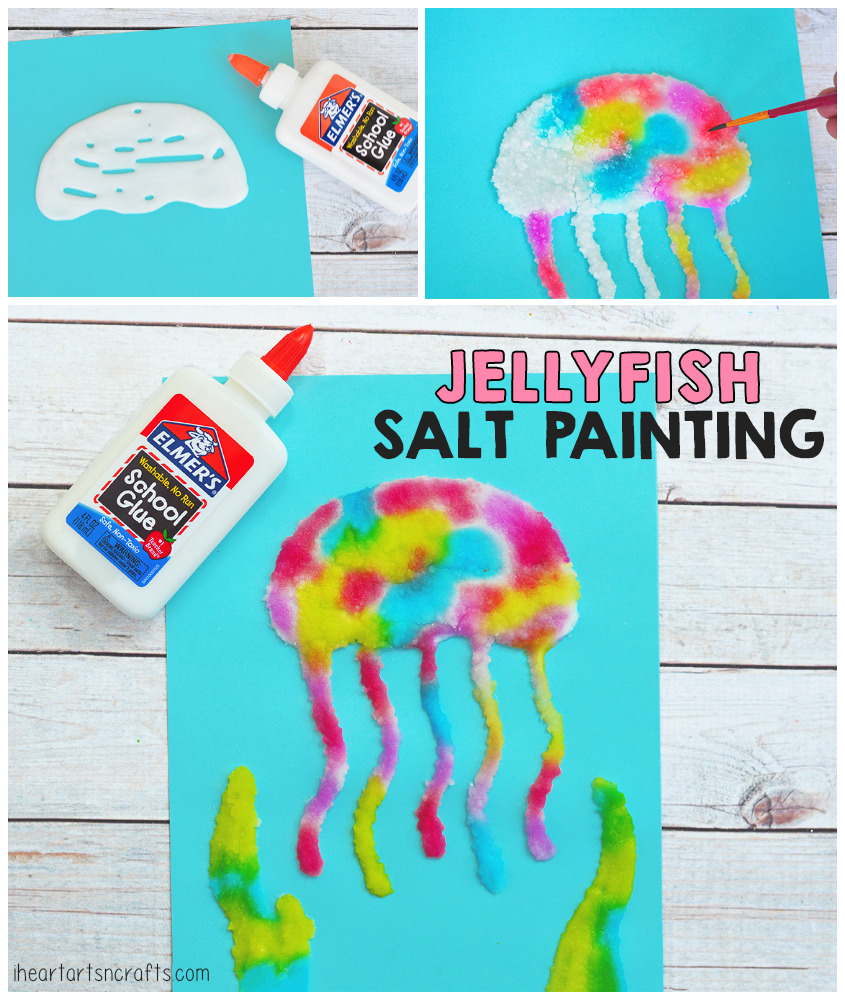
Jellyfish Salt Painting Process Art Activity
SUPPLIES NEEDED FOR SALT, GLUE AND WATERCOLOR ART:
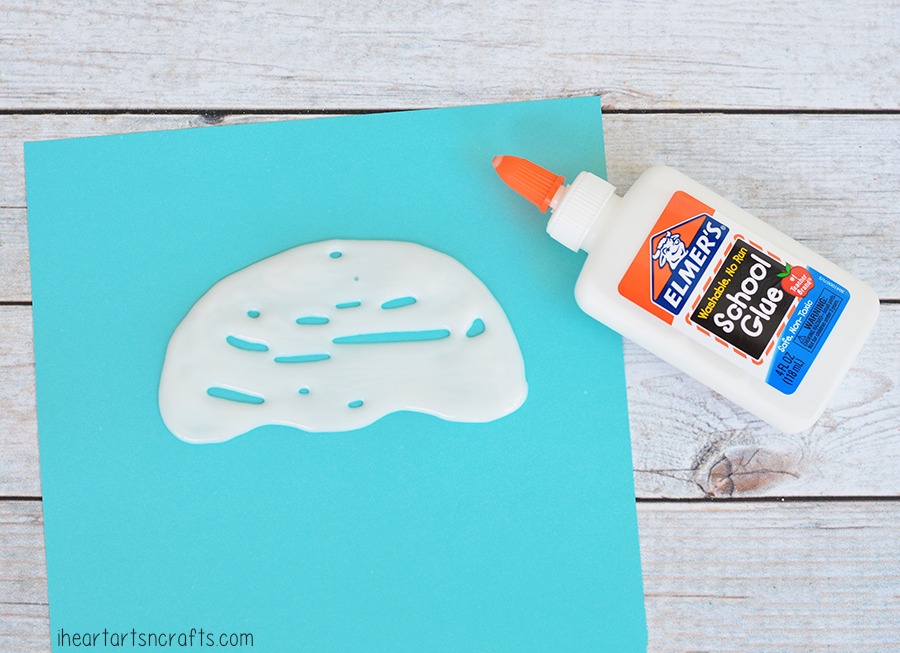
- Elmer’s Washable School Glue – Washable, no-run glue that is easy to use and stays where you put it.
- Card Stock Paper – We used a light blue color but any color will work fine.
- Paint Brush or Pipettes
- Liquid Watercolors or Food Coloring mixed with water
- Salt
DIRECTIONS:
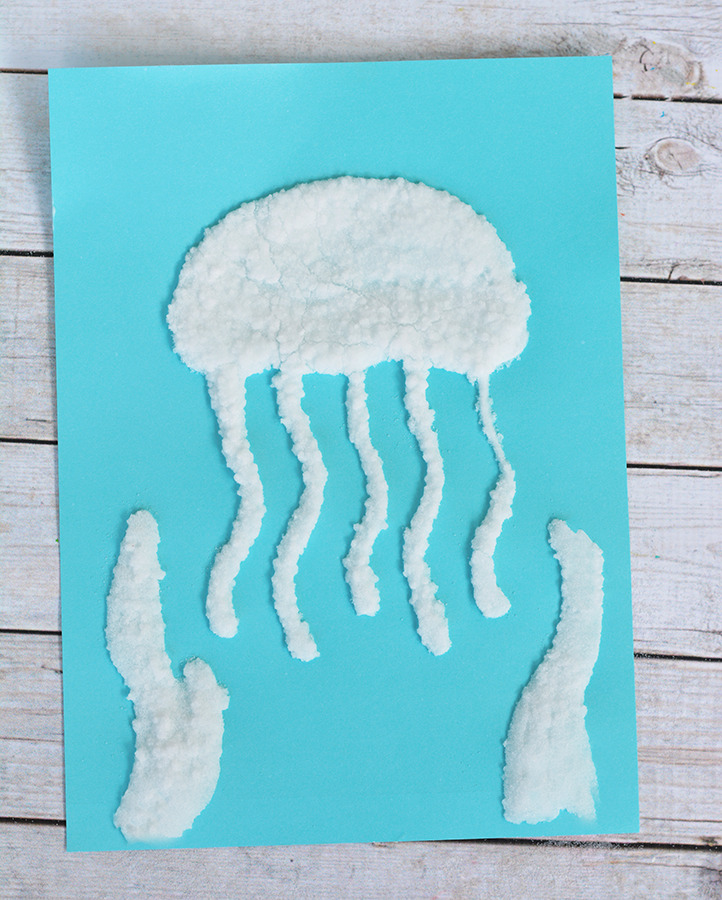
- First you’ll squeeze your glue designs onto your card stock paper. We opted for jellyfish because it’s one of my son’s favorite things to draw and they’re easy! You don’t have to do a jellyfish like we did. Use your imagination! After we finished our jellyfish, we ending up drawing stars for starfish, some sharks, and turtles.
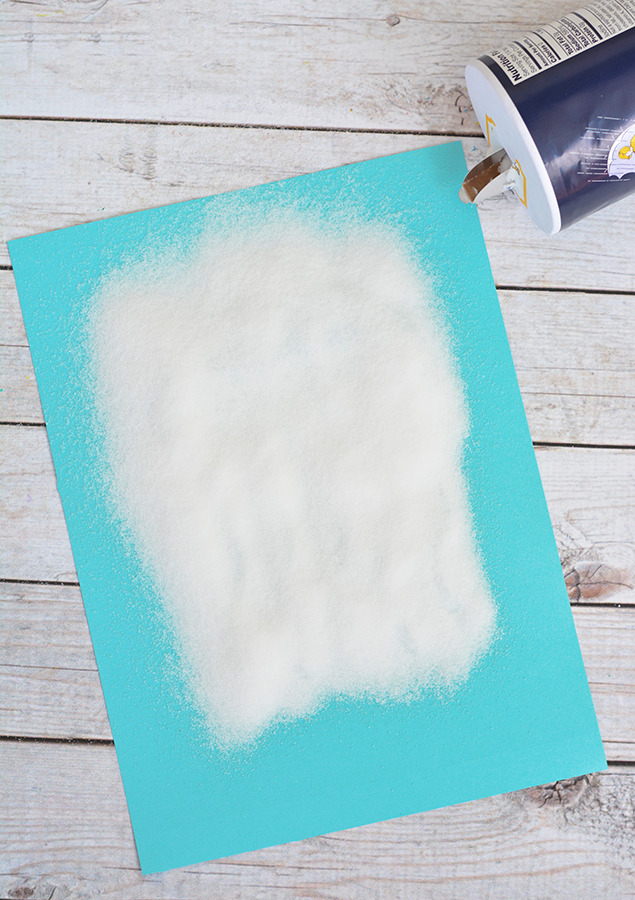
2. Sprinkle your design with salt until it is covered and then shake the excess salt off.
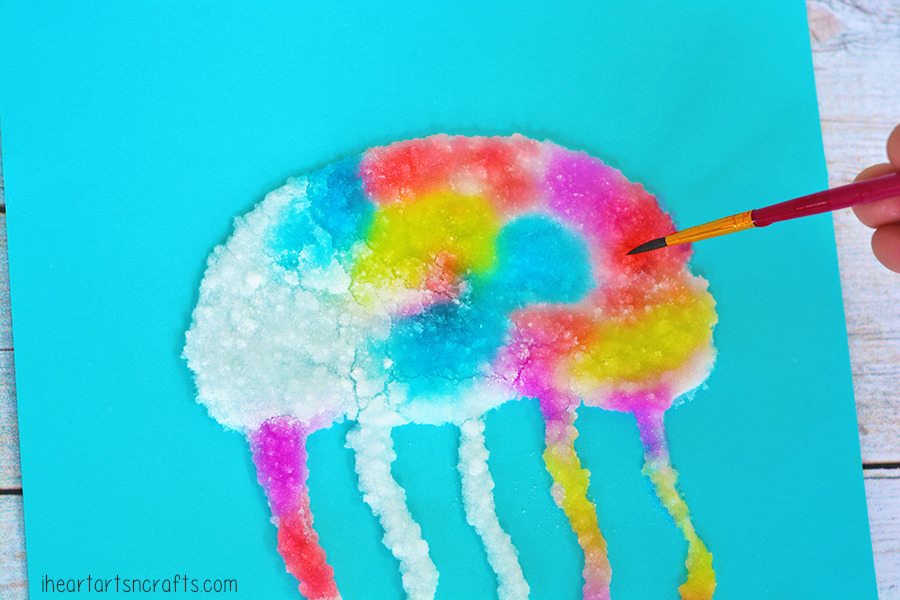
3. If you don’t have liquid watercolor paints for this step, then you can use food coloring. Take some plastic cups filled with some water and place a few drops of food coloring into each cup. We used the neon food coloring in this particular project. You’ll then dip your paintbrush into the paint and gently touch the salt covered glue lines and magically watch the paint travel and mix colors.
If you’d like, a medicine dropper or a pipette would work well for this activity too. Once you’re finished painting you can set it aside to dry for a day or two.
Once dry, display your new works of art!
Make sure to follow Elmer’s on Facebook, Pinterest, Instagram, and Youtube for more craft inspiration!
And don’t forget to follow I Heart Arts n Crafts on Facebook and Pinterest! And if you decide to make any of my crafts, please share them on my Facebook page or use #iheartartsncrafts on Instagram for me to see!
Pin it to save for later: