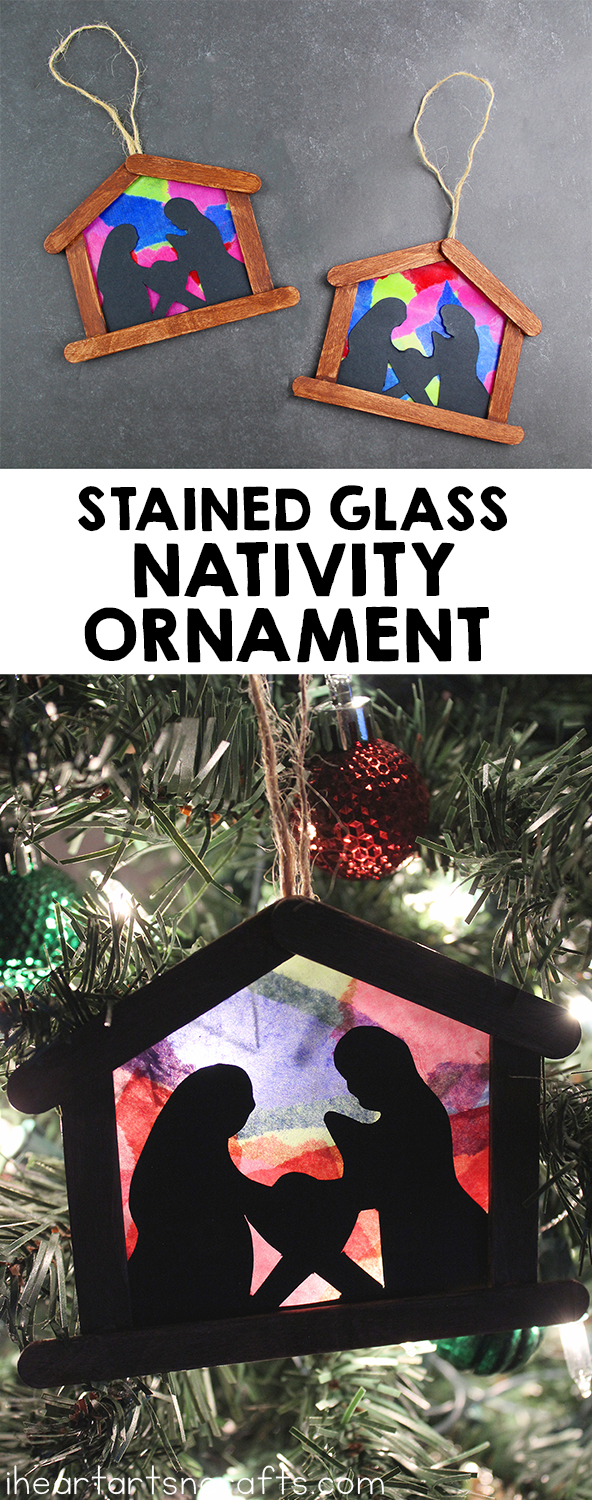
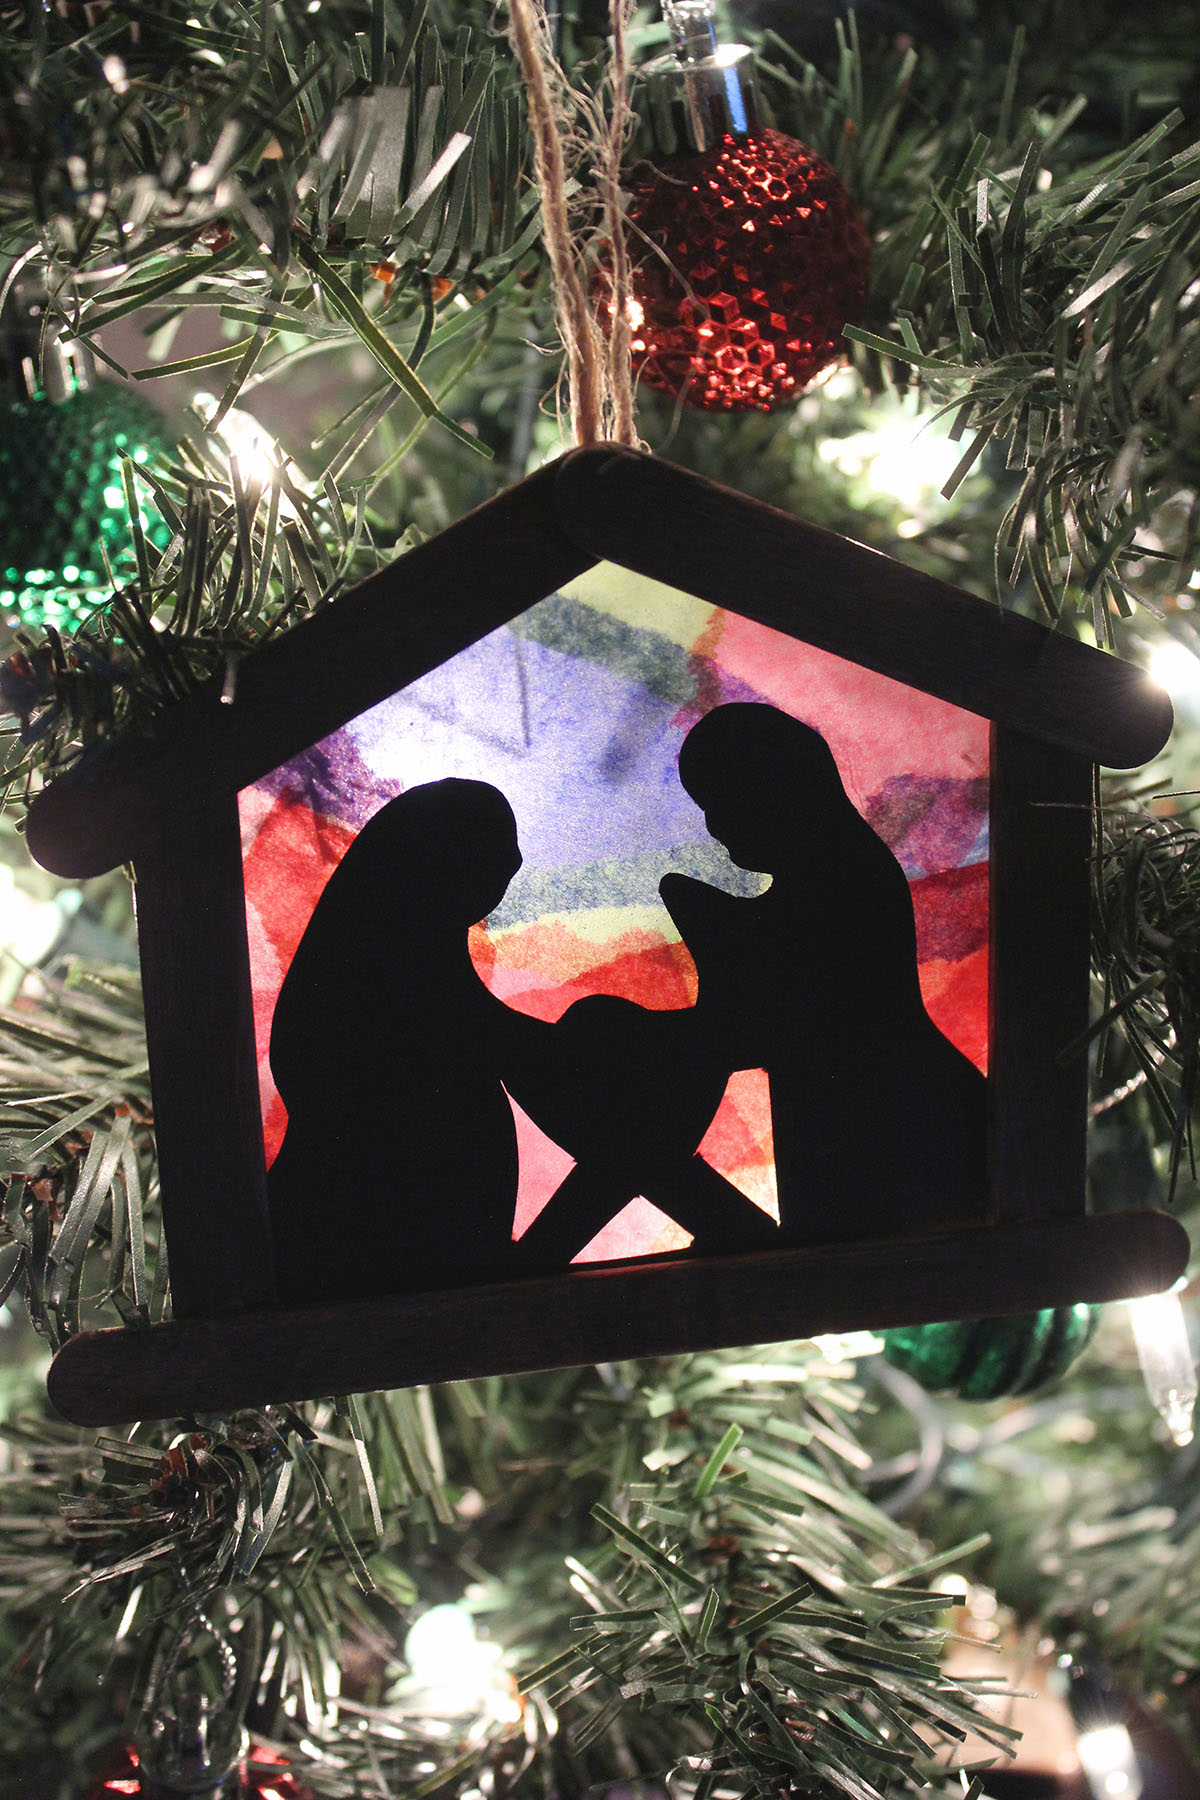
These Stained Glass Nativity Ornaments are such a beautiful craft for the kids to make and hang on the tree. And such a meaningful reminder of the reason for the Season! The great thing about these nativity ornaments is that the Christmas story really shows through because they’re in black silhouettes. So they look so pretty lit up on the tree!
Stained Glass Nativity Ornament Christmas Craft
This post contains affiliate links. Please see my disclosure policy.
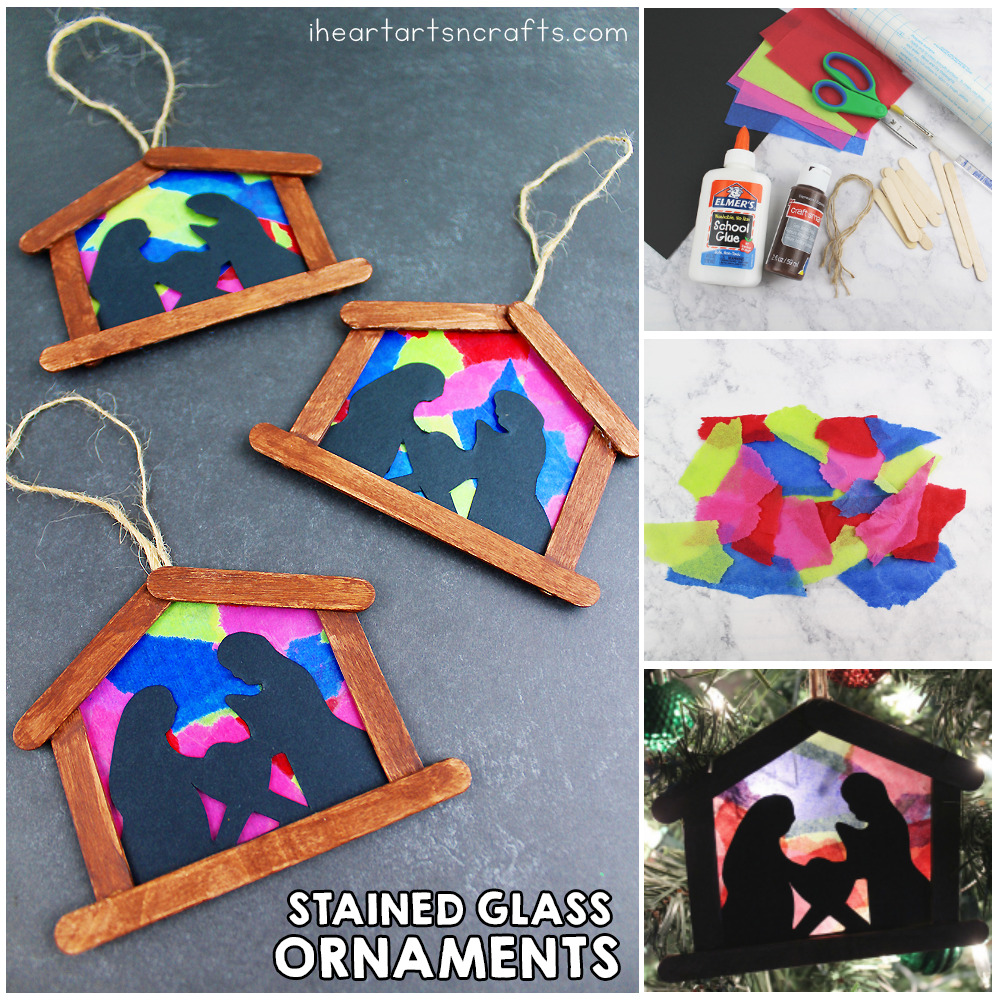
Supplies:
- Tissue Paper
- Scissors
- Glue
- Paintbrush
- Brown Paint
- Popsicle Sticks (regular and mini)
- Twine
- Black Cardstock
- Contact Paper
Instructions:
1. Glue 2 mini popsicle sticks to a regular popsicle stick. Refer to the photo.
2. Make an arch by gluing 2 mini popsicle sticks together. Refer to the photo.
3. Glue the 2 pieces together to form a stable.
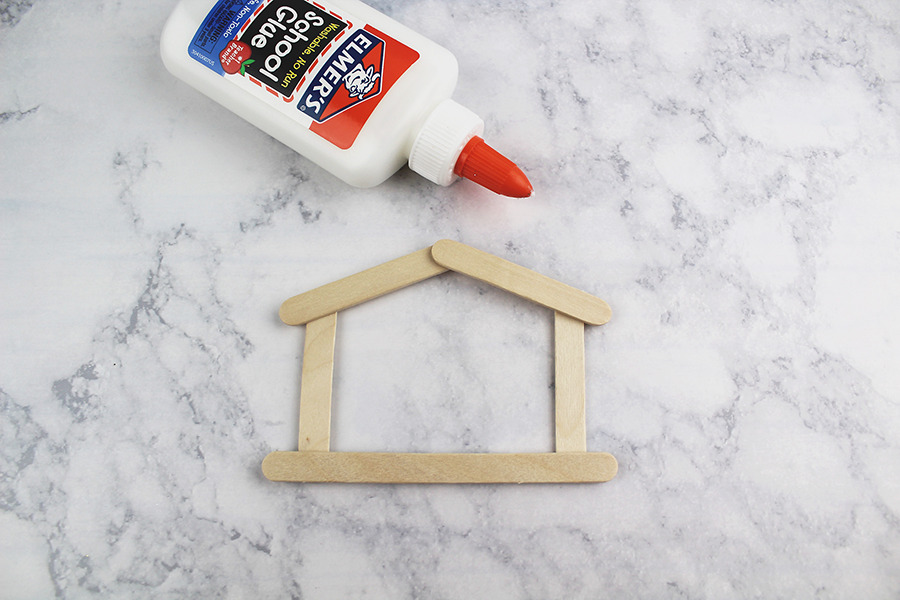 4. Paint the stable brown. Allow to dry completely.
5. While the stable dries, download the Nativity silhouette template. Print the template here and cut it out. Set aside.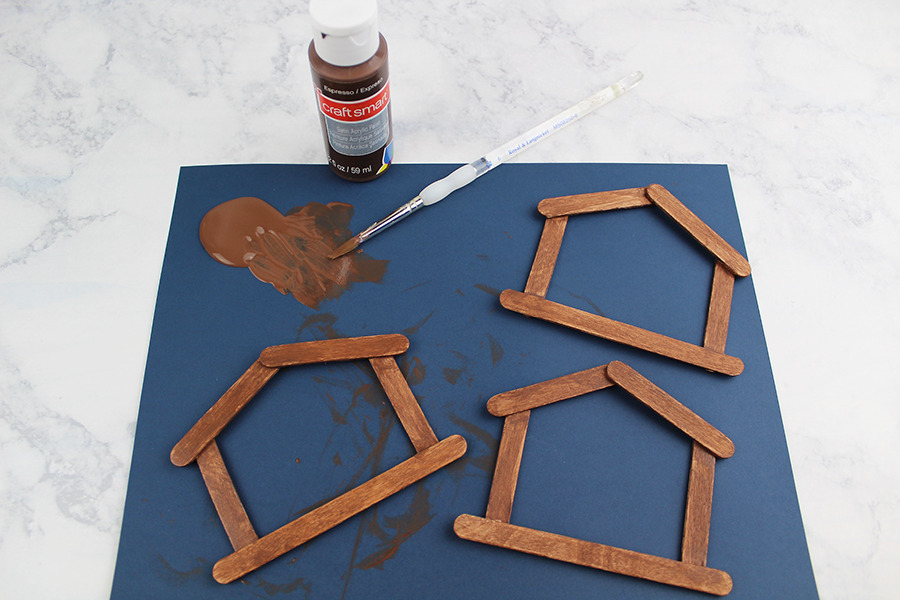
6. Rip tissue paper into small pieces.
7. Cut a piece of contact paper a little larger than the size of the stable.
8. Cover the sticky part of the contact paper with the tissue paper.
9. Cut a second piece of contact paper a little larger than the size of the stable and cover the tissue paper. Press out any bubbles.
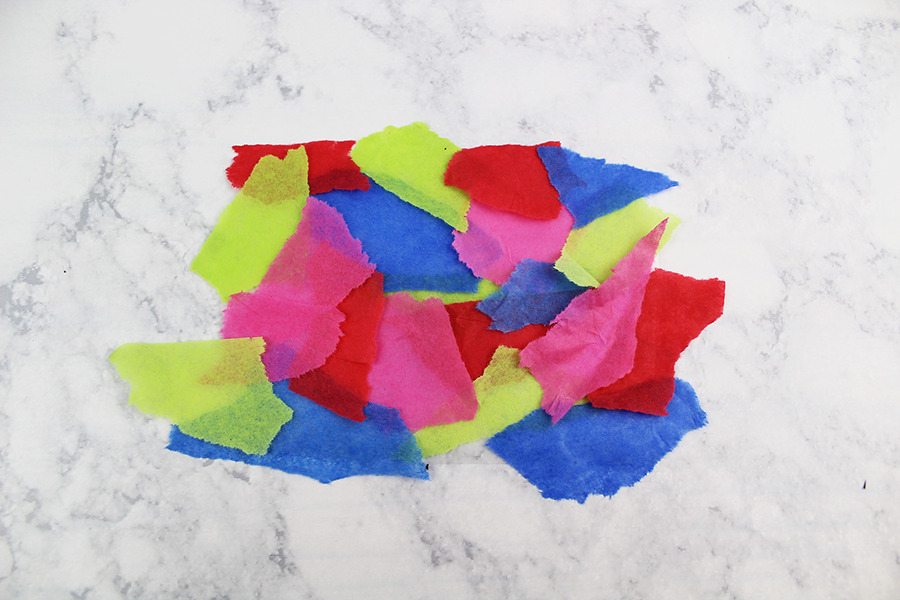
10. Cut the contact paper into the shape of the stable.
11. Glue the silhouette onto the contact paper and then glue the contact paper onto the back of the stable.
12. Finally, glue a small piece of twine to the top of the ornament for hanging on a Christmas tree.
Your ornament is finished. These would make wonderful family keepsake gifts!
Make sure to follow I Heart Arts n Crafts on Facebook and Pinterest! And if you decide to make any of our crafts, please share them on our Facebook page or use #iheartartsncrafts on Instagram for us to see!