This post is a sponsored post. I was given the xTool S1 machine to review. As always, all opinions and experiences expressed are my own. This post contains affiliate links. Please see my disclosure policy.
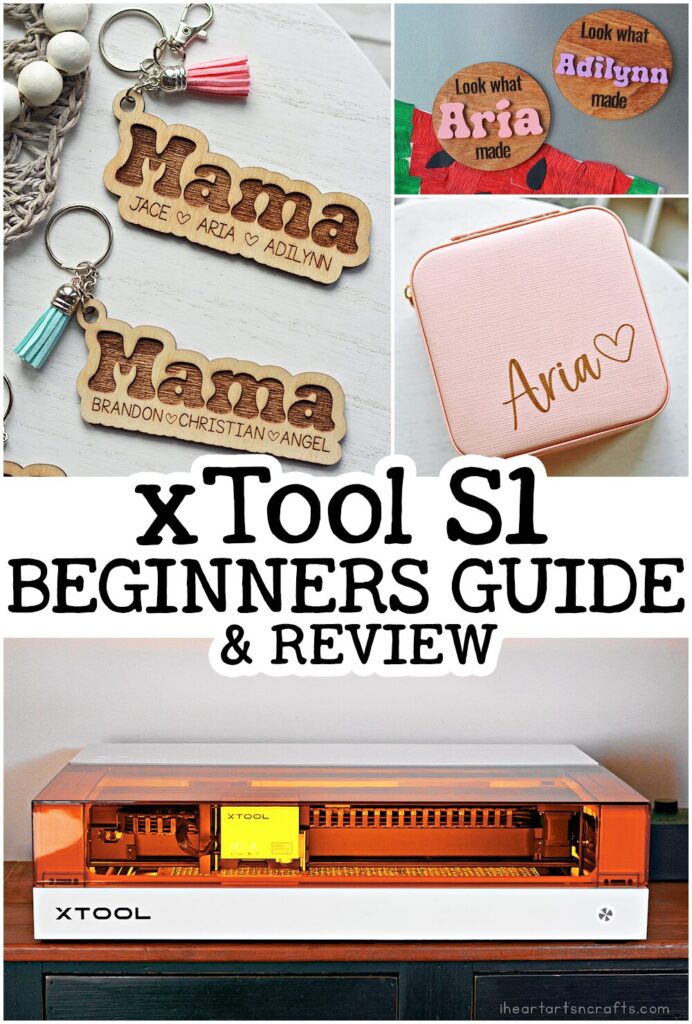
This xTool S1 beginners guide will help you decide if this user friendly laser cutter and engraver is the right tool for you.
I’m excited to share with you my latest DIY tool – my new xTool S1 10w laser cutter & engraver! I’m going to cover all of the basics of this machine, how-to set up, and some simple projects we’ve created to help get you started on your new laser journey. Because I promise you, once you start you will not stop!
If you’re looking to start a side hustle in the laser engraving business, the xTool S1 10w is the perfect machine to start using. Before I got into laser crafts I thought the machines always looked so intimidating. But after learning my xTool S1, I couldn’t believe how user-friendly the machine and even the software was. I was doing projects right after I had my S1 hooked up and ready to go. Actually, the wooden keychain at the end of this post that I’m sharing is my first project. There’s such a vast range of materials that you can cut and engrave, it gives you the freedom to explore and diversify your product offerings.
What is the xTool S1 10w Laser Cutter & Engraver?
The xTool S1 is the world’s first 40W enclosed diode that features interchangeable laser modules in a enclosed eye-friendly machine. Making it perfect for in-home use. It has a speedy motion system that can hit 600 mm/s to produce work pretty quickly, and a large interior space to accommodate sheets of material of up to 19 x 23 inches. The xTool S1 features a pin-point positioning system which enables precise positioning and multiple objects in one pass.
You can cut, score, and engrave:
– Wood
– Leather
– MDF
– Felt
– Paper
– And dark opaque acrylic
– Stainless Steel
– Glass
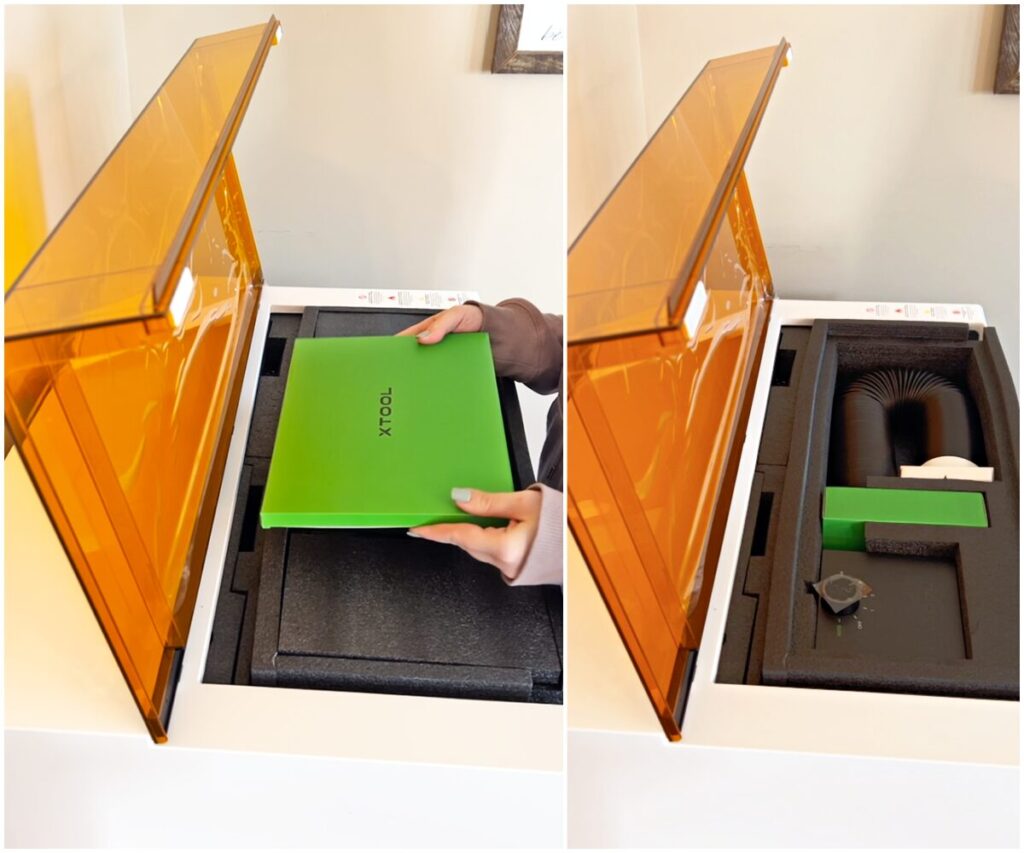
The box is packed really well, and has two straps around the machine that made it easier to lift it out of the box. And all the tools, manual, and hardware that are needed are stored inside of the machine under the foam.
Here’s what you’ll find inside:
- The xTool S1 10w
- Air Assist Accessory
- Honeycomb Accessory
- 10W Laser Module (40W and 20W versions also available)
- Instruction Book
- Power adapter
- Hex Driver
- Spare lens covers (2)
- Exhaust Hose
- Sample material to test out
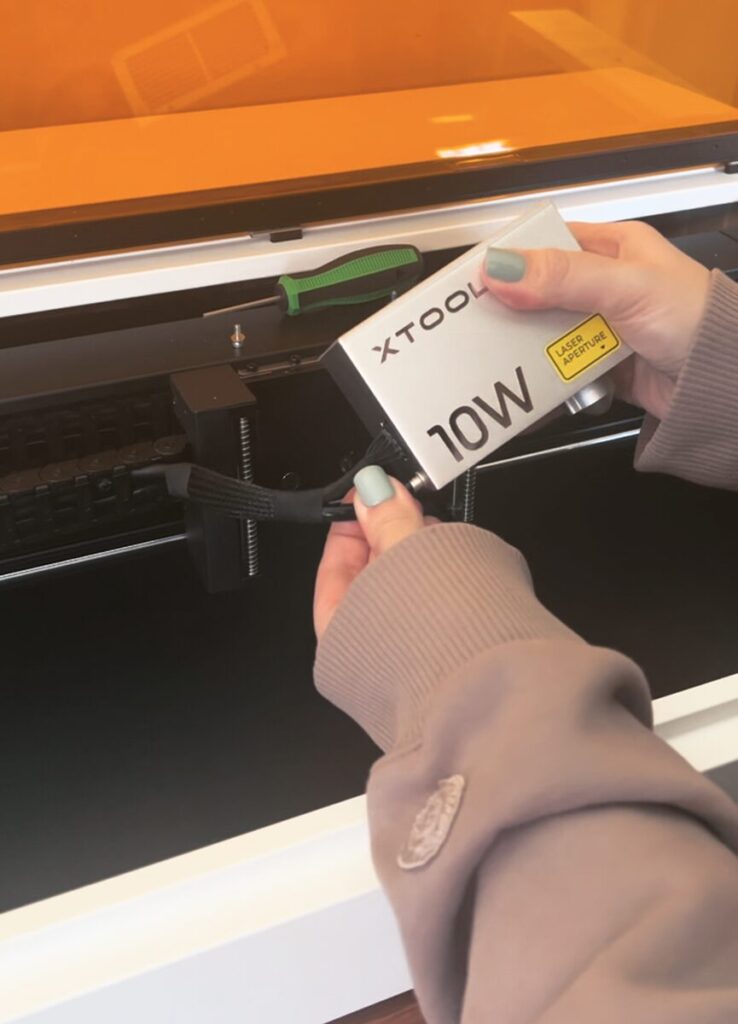
Once I had the machine out of the box it took about 30 minutes to finish setting up. It comes almost completely pre-assembled. In the interior of the machine under the lid, there are screws that you have to remove so that the laser arm can move. And then you’ll set your laser module in place and screw it in. After that’s done you’ll hook up your exhaust tube to a nearby window. If you aren’t near a window or door that leads outside, you can also purchase a Smoke Purifier.
Special Features
- Lid-open safety stop – It will only operate with the lid closed.
- Interchangeable Laser Modules – My S1 comes with a 10W laser module, but a 20W, 40W module, and a 2W infrared module for engraving metal are also available.
- Emergency Stop Design – Opening the lid turns off the laser and it also features an emergency stop button to use Tilting and dropping will also turn off the laser, plus the machine is equipped with flame sensors to shut down the machine incase of flare-ups.
- Eye-Friendly – The S1 is a fully-enclosed diode laser, which eliminates the need for safety glasses while using it. This makes it much more convenient to use inside your home.
Tips For Beginners
- xTool Community – I love the xTool community on Facebook. Everyone has been so helpful, I haven’t had a question that I couldn’t get answered there.
- How To Remove Smoke Residue – You can first cover it with a masking tape. But if you don’t use masking tape you can wipe with Dawn Powerwash and it gets everything off for me every time. I’ve also had vinegar work, too.
- Where To Find Files – You can find ready-to-make files on Etsy, Facebook, and Shopify. Just search xTool laser files. You can also access https://projects.xtool.com for project files, how-tos, and craft inspiration from the xTool Community.
Connect To xTool Creative Space
The software program that operates the S1 is called xTool Creative Space.
To download the software visit xTool.com, and select software from the menu across the top of the screen. Then you can select the proper version to install. Once you have your XCS installed and your xTool S1 connected you can start designing!
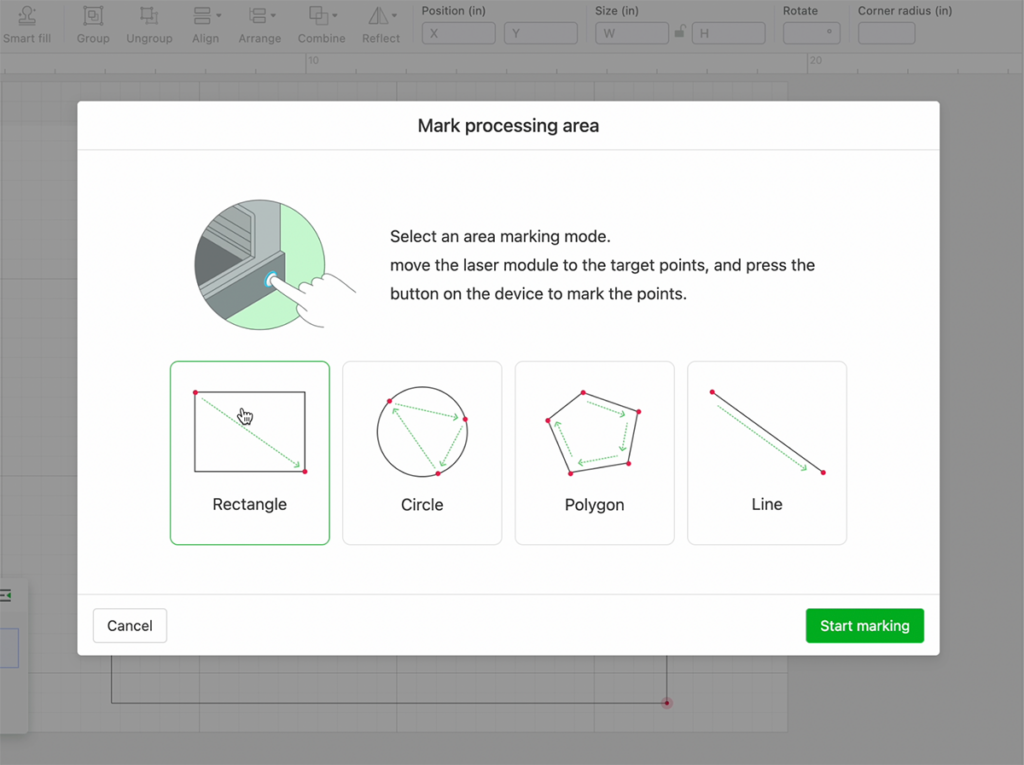
To begin any project you’ll want to start with using the twin point positioning so that your material is outlined on your computer screen. Instead of a camera seeing the material, you move the laser module and the technology measures and positions the machine. To do this, you’ll start by clicking on the start marking button and then move the laser module to the top left corner of the material. Once situated, you will then push the button on the machine and it will mark it. Then you will move the laser module to the bottom right corner and push the button. Once it is done, xTool creative space will do an outline of the material on the screen.
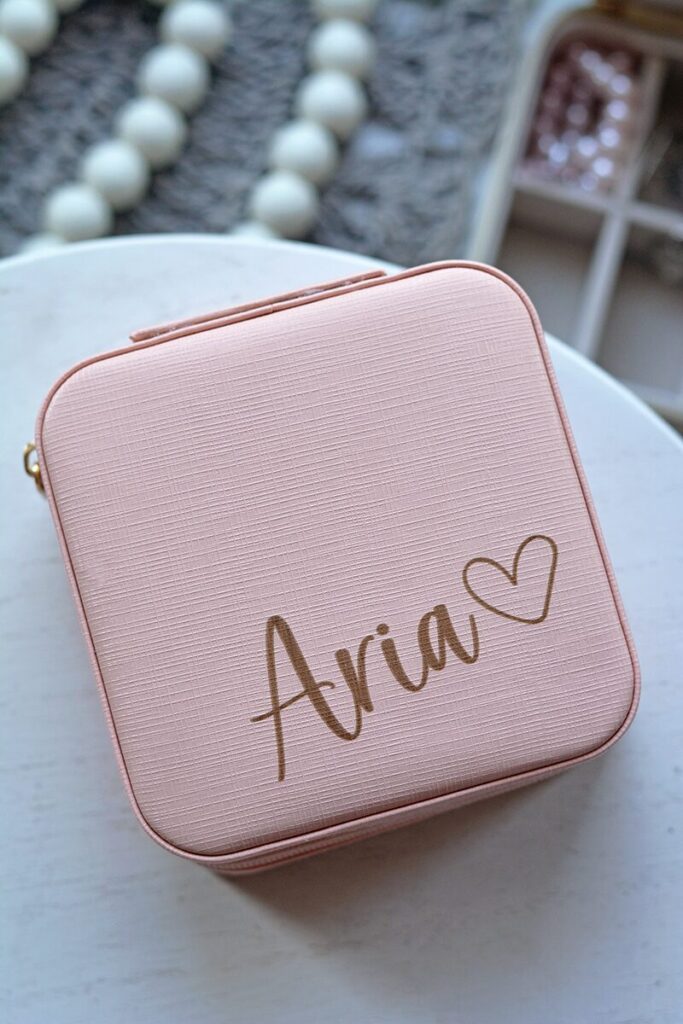
My first project was a quick engraving on this leather jewelry case for my daughter.
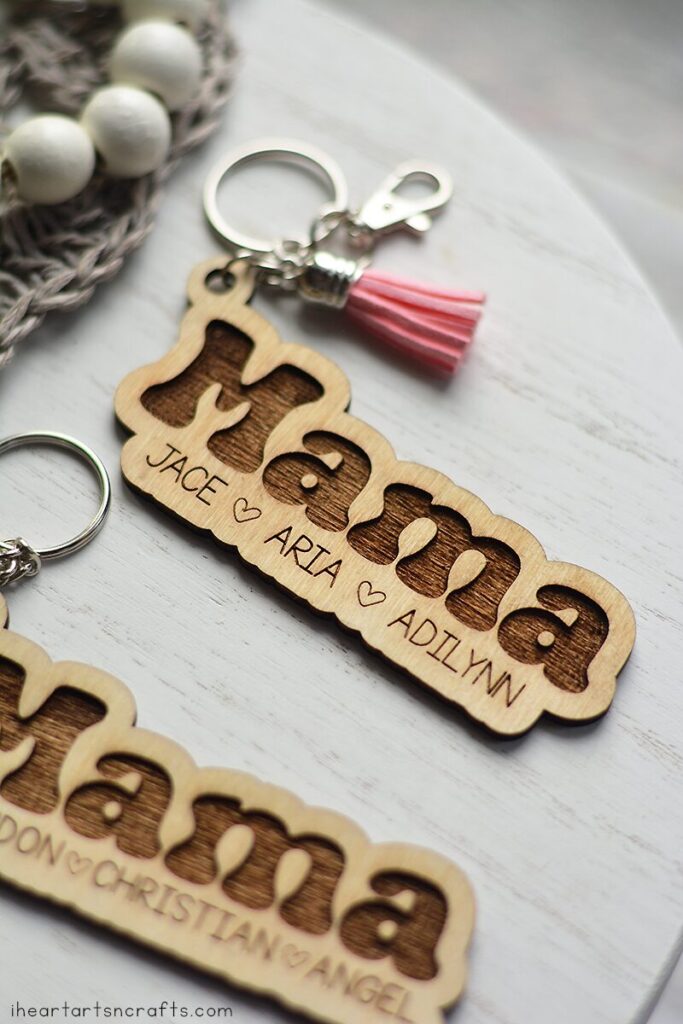
Then I did these cute personalized Mama keychains made out of wood. These are a great first project because they were so simple to do! And they make a great gift or item you can start selling. I did these on a 3 mm sheet of plywood. And I ordered the keyring and tassels in bulk off of Amazon.
How To Make Personalized Wooden Keychains With The xTool S1 10w
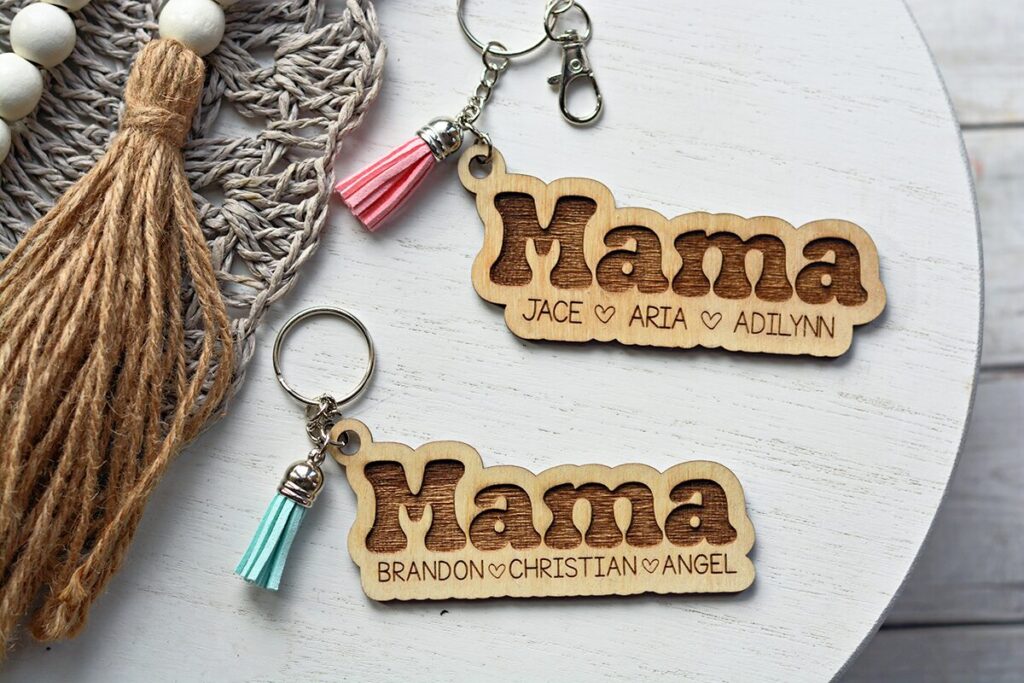
Start by placing your 3mm plywood onto of your honeycomb and setting your marking mode. Once that’s finished you’ll select a font and type in Mama. And then resize it using the corners to about 4 inches. Then select your mama text and select engrave on the right and change your power to 80 and speed to 40.
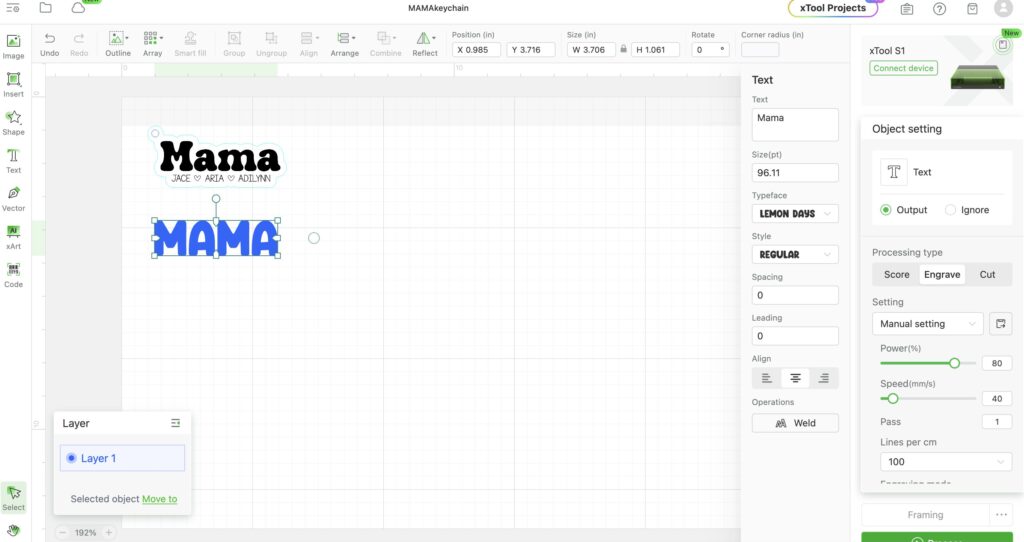
Next you’ll want to add in the names of your children underneath the mama font. So you can chose a different font for this part and then type the names and resize them to fit underneath the Mama text. Then once those are added I like to make sure that I’ve selected both of them and select engrave and change that power to 80 and speed to 40 on the right hand column. This will be the same as the Mama text.
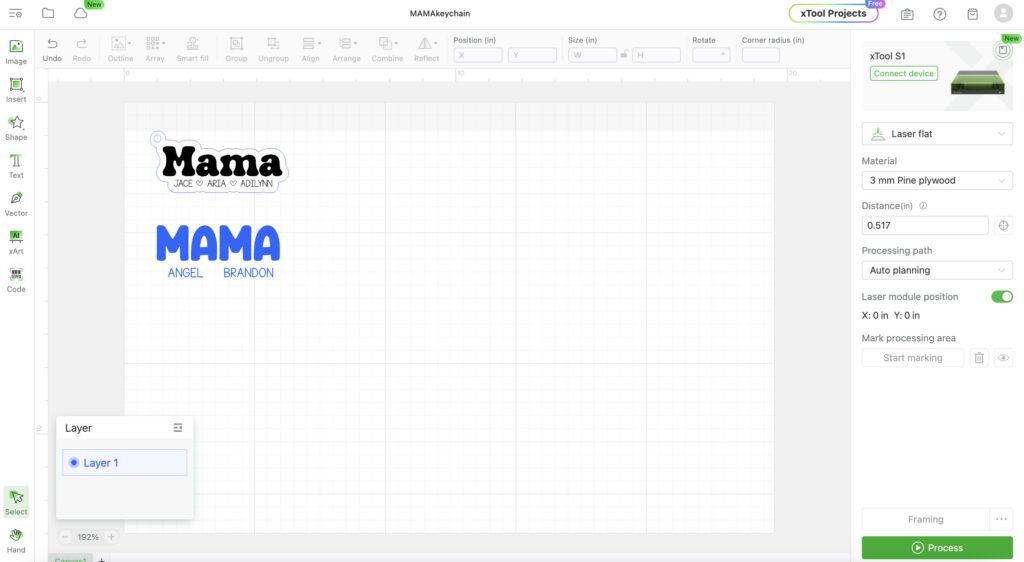
Then I separated the names by adding in a heart shape between them. You can select the shape icon on the left and insert a heart that way. Or add in an image of a heart. If you select image on the left and upload your heart image. You’ll want to make sure the image is selected and then hit edit image.
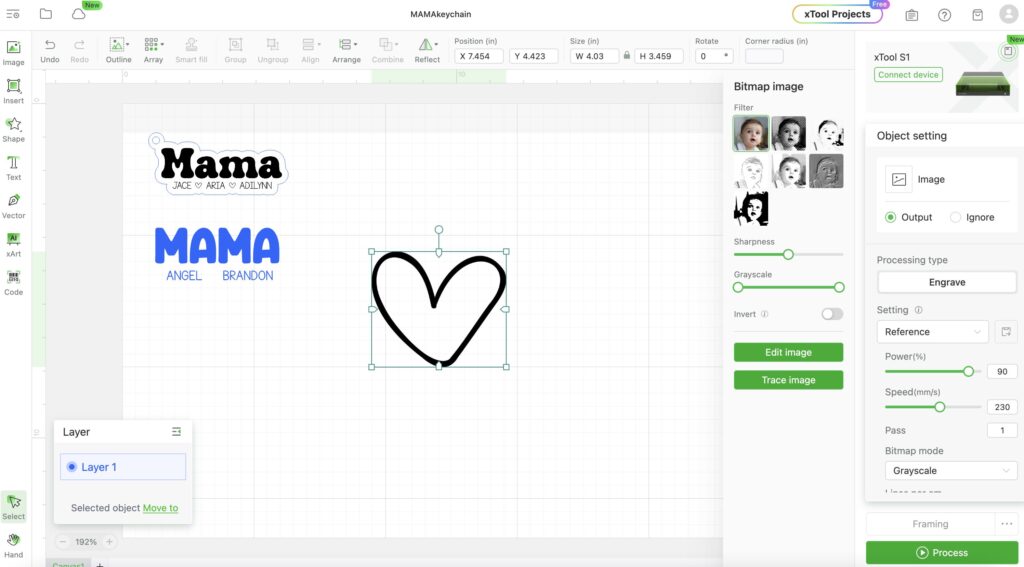
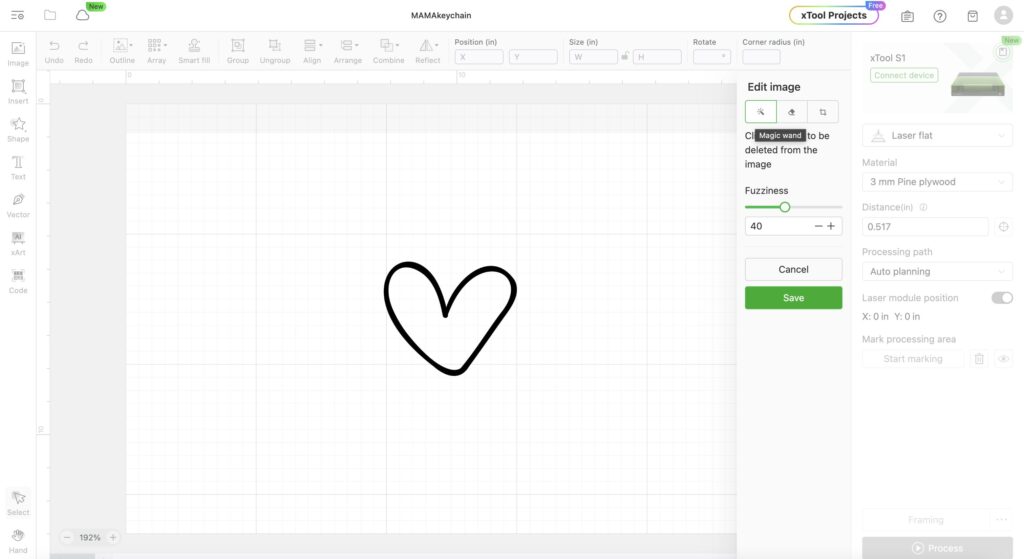
After you select edit image, you’ll see in the screenshot below there’s a magic wand icon. Use this to tap on the background of the heart and it will erase it. Giving you just the black outline of the heart shape. Then you’ll save your edit and resize the heart to insert it between the smaller names.
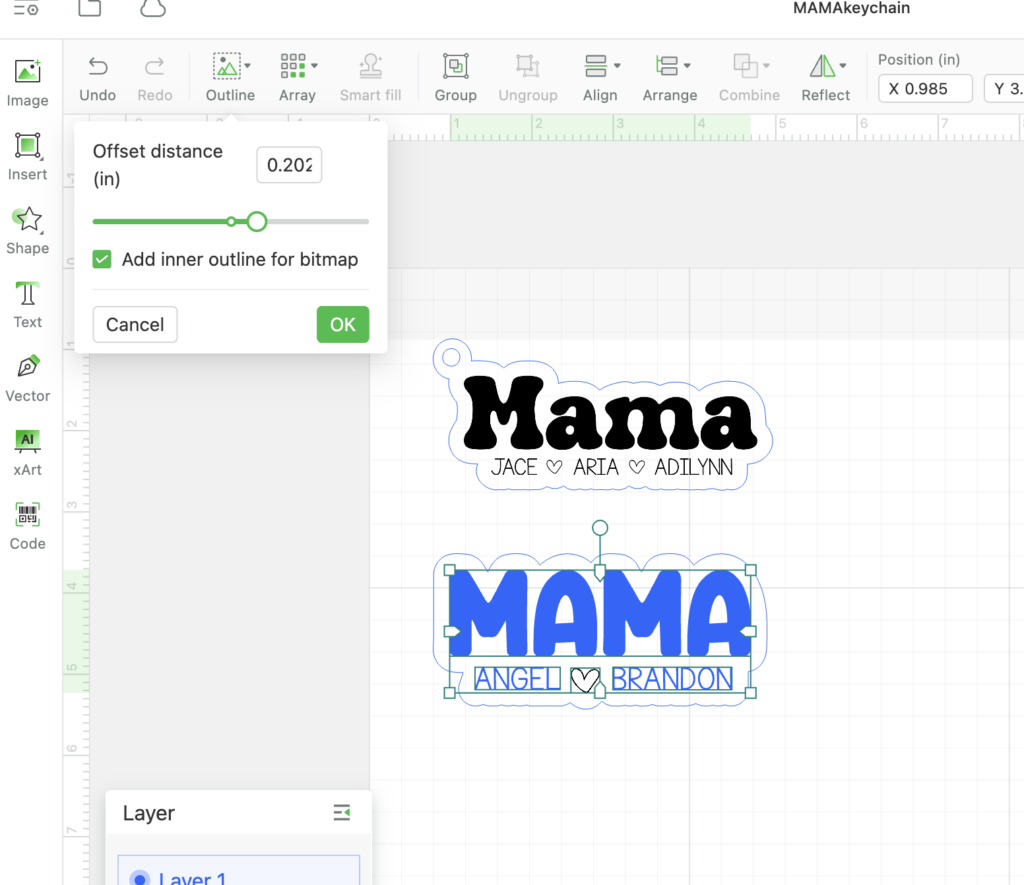
Next, you’ll select all of your texts and the heart image. Then go up to the top left and select outline. Adjust this do you’re liking to create a thick outline that the xTool S1 will be cutting out. I used .202 for mine.
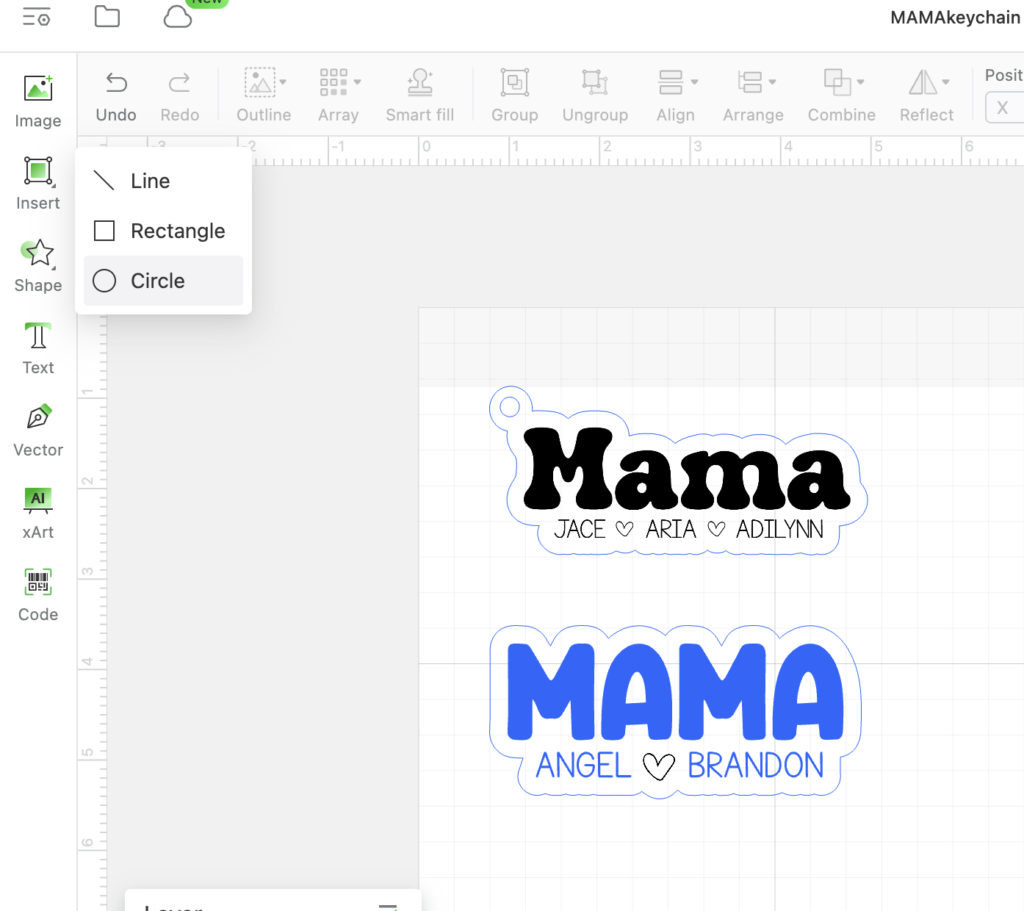
Now were going to add in two small circles to the top left so that you have a place to insert a keyring. Select shape and then circle and add a small circle using the corners to resize it.
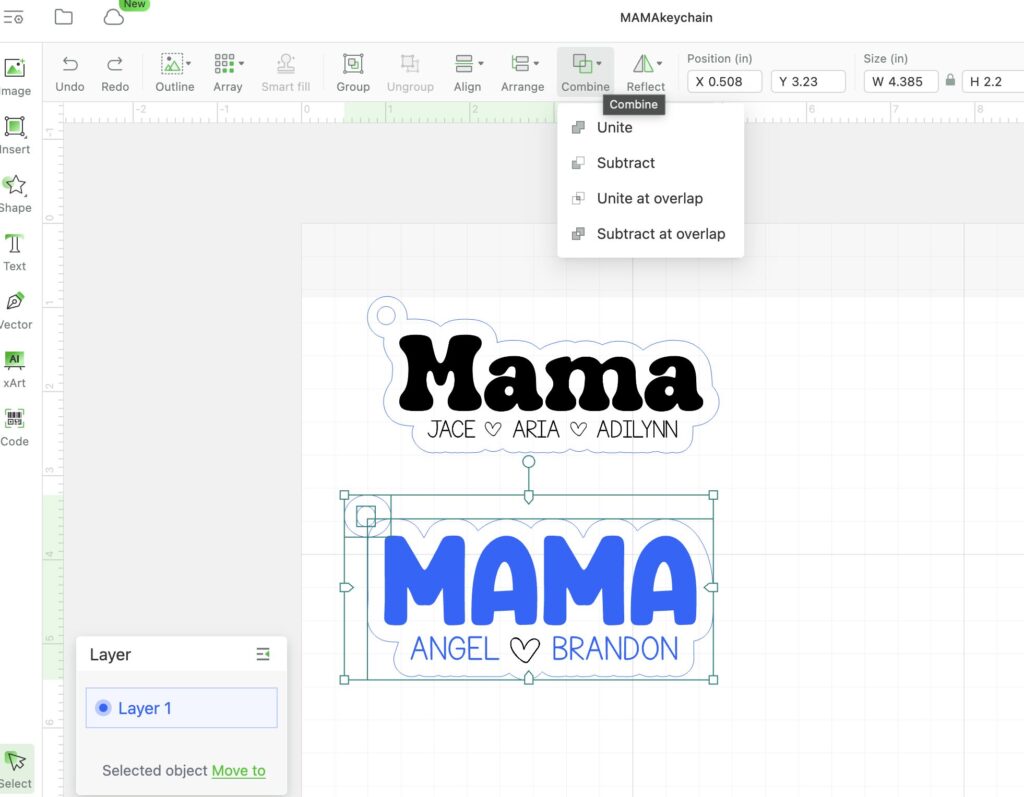
Next select the text outline and the larger circle. You’ll go to the top and hit combine and then unit. This will be the outline the S1 will be cutting out. Then add in an small circle where your bigger circle was added for your keyring. Then select the small circle and make sure cut is selected on the right.
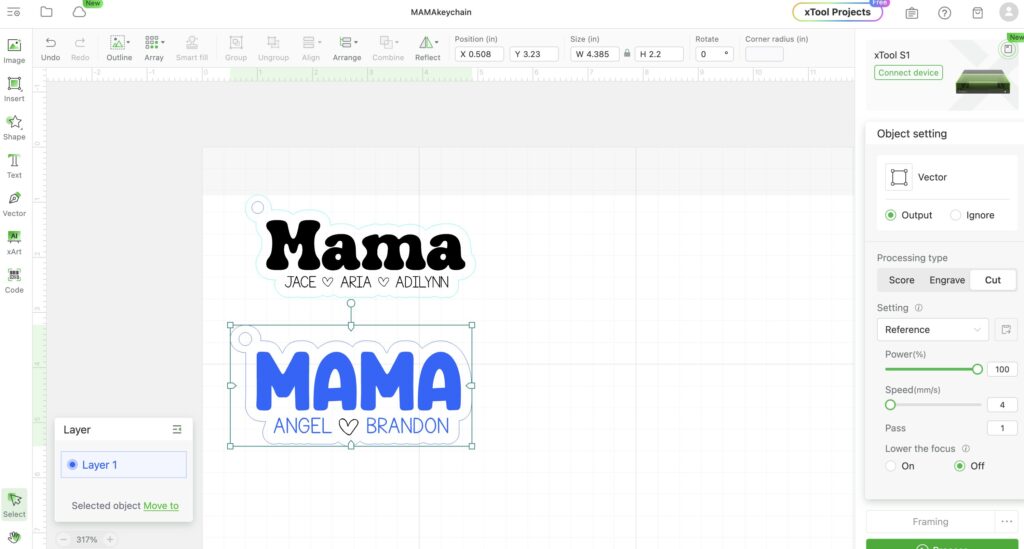
Before I’m ready to process my project for cutting I like to select each layer to double check that all of the power/speed settings are correct. If they are then select press process. If you have any marks from the wood burning you can use Dawn Power Wash to give it a quick wipe to remove any residue. Then add on your keyring! And that’s it! Super easy to do and so fun!
I can’t wait to show you more laser projects with our xTool S1 in the new few weeks! I recommend the S1 10w to anyone looking for an all-purpose laser to help start their small crafting business. I love that the laser can be upgraded with different tool heads so it’s great for beginners that want to invest later on down the road once they’ve gotten better at it.
Check out all the other crafts and projects I have made with my xTool S1 here.
